Introduction
You can send communications to a person at one of your Suppliers. If their name and email address isn't in the system, you can either add it manually, or export the list of contacts, add to the list and re-import.
Manually add a Contact Person
- Start at Invoice Automation > People.
- Click New contact person.

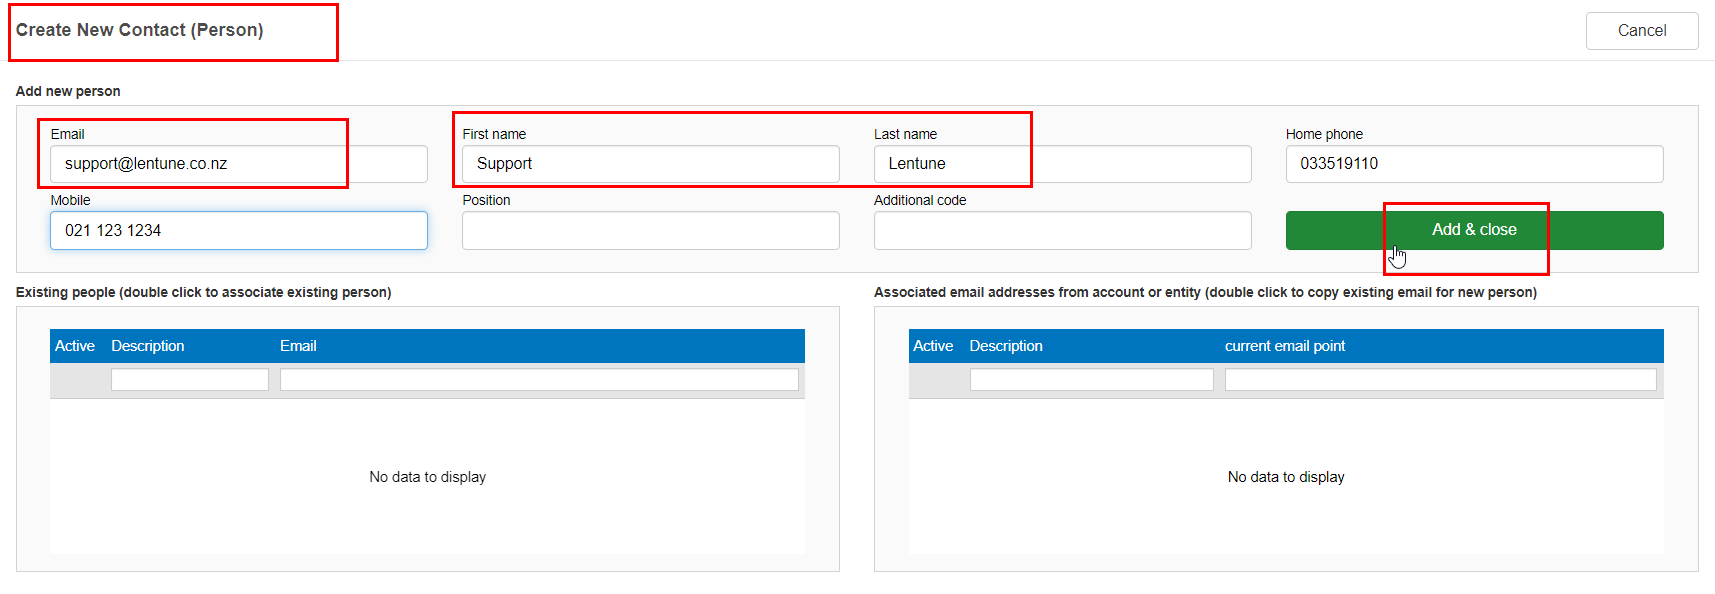
This takes you to the Create New Contact person screen.
- Enter the Email address.
- Enter the First name and Last name.
- Enter their mobile number and other fields as required.
- Click Add & Close.
To find an existing Person and add more details:
- Go to Invoice Automation > People.
Here you can search for individual people, and view the Details for further information.
In the Details tab, you can associate a Contact Person with an Account.
In the Account associations section on the bottom right of the screen:
- Search for and select the Supplier name.
- Click Add account association.
This will now show in Account Associations.
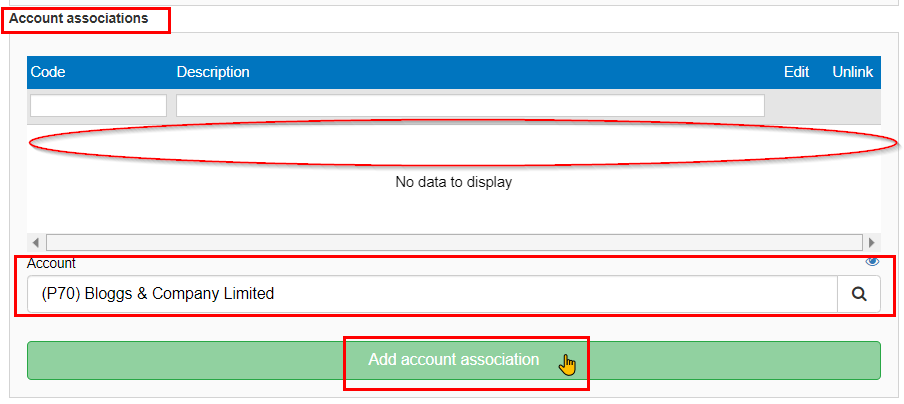
- Click Save and close.
Import Contact People details
If you have multiple Contact People who you wish to add, you can export the existing list, add to it and re-import it.
Export a spreadsheet:
- Start at Invoice Automation > People.
- Click Import / Export / Consolidate.
- Select Export.
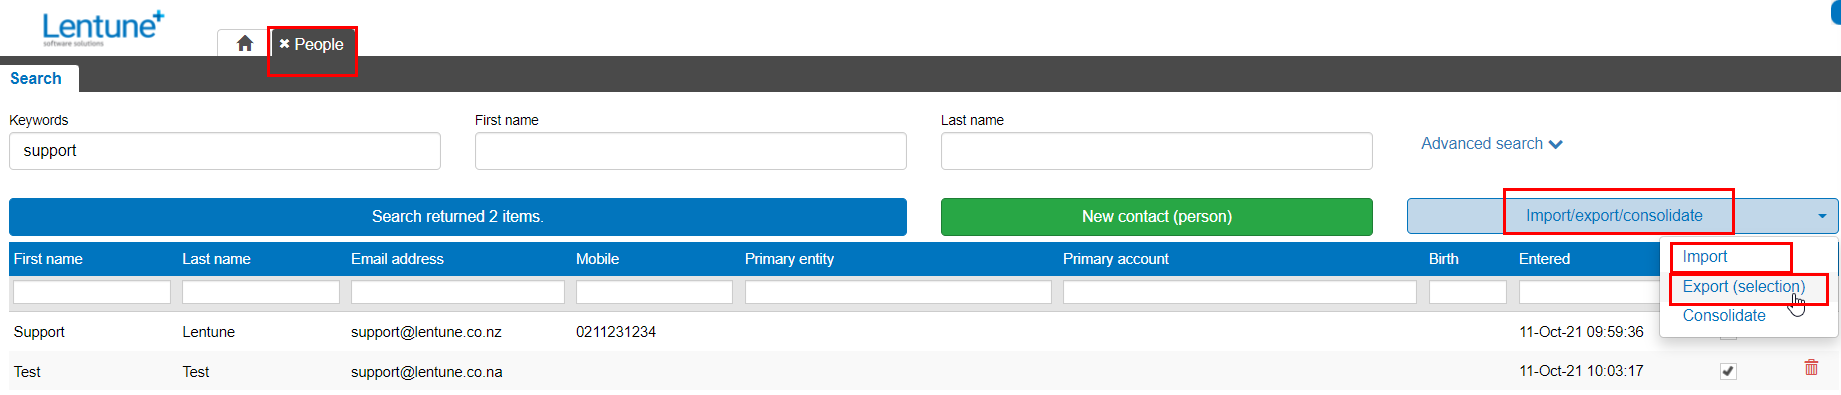
This creates an .xlxs spreadsheet.
- Open the spreadsheet and add new lines for Contact People as required.
-
- Person_GivenName: First name.
- Person_FamilyName: Surname.
- Person_Email: Email address.
- Account_Code: To find this, refer below.
- Active: This field must be set to TRUE.
- Add all the people you wish and save your spreadsheet.
Reimport the spreadsheet:
- Go back to Invoice Automation > People.
- Click Import / Export / Consolidate.
- Select Import.
- Browse for or drag your file to the import box.
- Click Import.
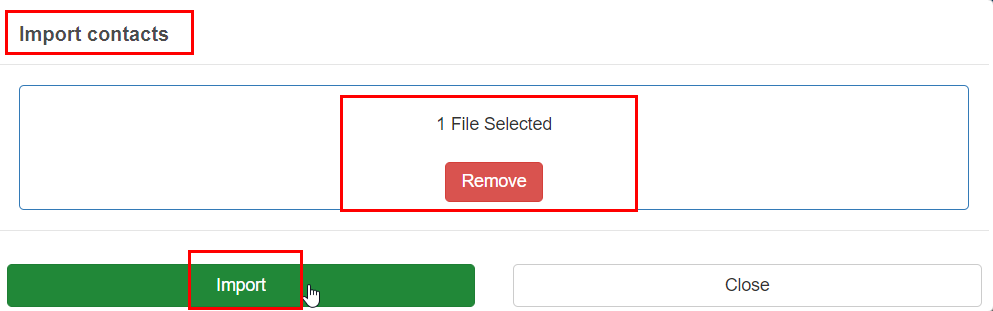
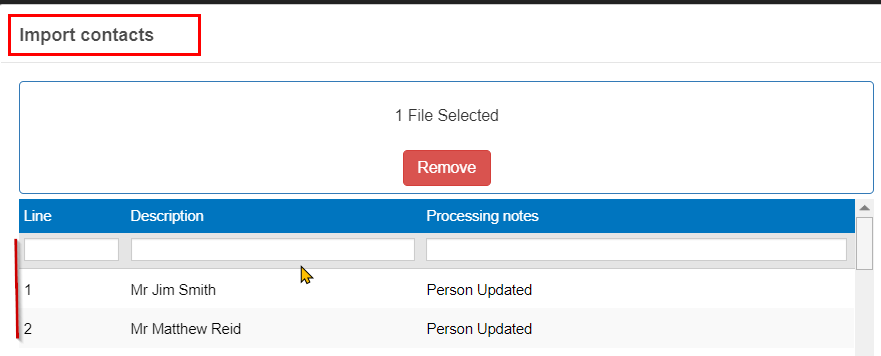
The Import contacts screen will then display the Contacts who have been imported.

- Click Close.
If you have the correct Account code against a person, you can now select their Contact to send email communications via the Check invoices or Approve invoices screens. Refer here to see how that works.
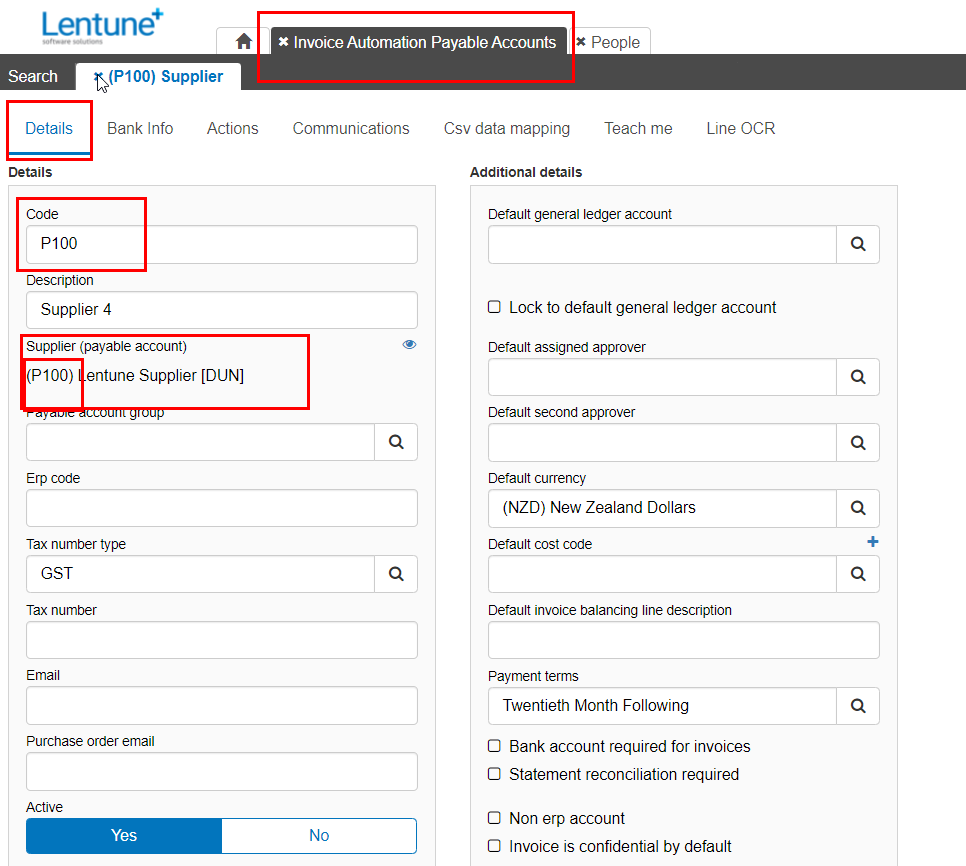
To find the correct Account Code for a Contact Person
- Start at Administration > Payables.
- Search for the Payable Account that you want.
- Look for the code in brackets in the Supplier (payable account) field. This is the code to use, without the brackets.
Need more help? We’re here! We hope our article was helpful! If you need more info or want to connect, drop us an email at support@lentune.com.
Thank you. We love to hear from you!
Last updated: 10 July 2024