Introduction
When your Payment claim has been prepared and approved by your customer, you can now mark it as approved and create the invoice for it.
Please refer to Create a Payment Claim for your Head Contract to read how to prepare the claim.
Approve the Claim
When any queries or disputes have been resolved with your customer, you can Approve the Payment Claim.
- Go to Payment Claims > Head Contract.
- Select your Contract.
- Go to the Claims tab and highlight the Claim you want to work on.
- Click Approve.
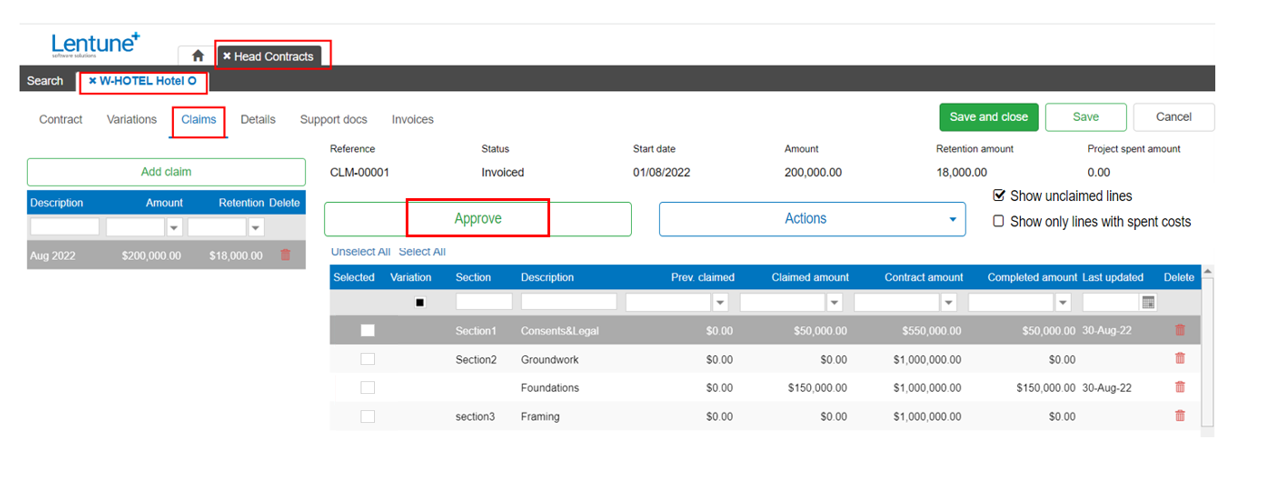
This will mark the claim as approved. You are now able to invoice it.
Invoice the Payment claim
Now that the Payment Claim has been approved, you can invoice it. There are two places where you can create your invoice; from the Claims menu > Invoice Head Contract Claims, or from the Head Contract > Claims tab for that Contract. Both options perform the same function.
NOTES:
- The Claim must be prepared and approved before you can invoice it.
- Once the Claim has been invoiced, it cannot be changed.
.
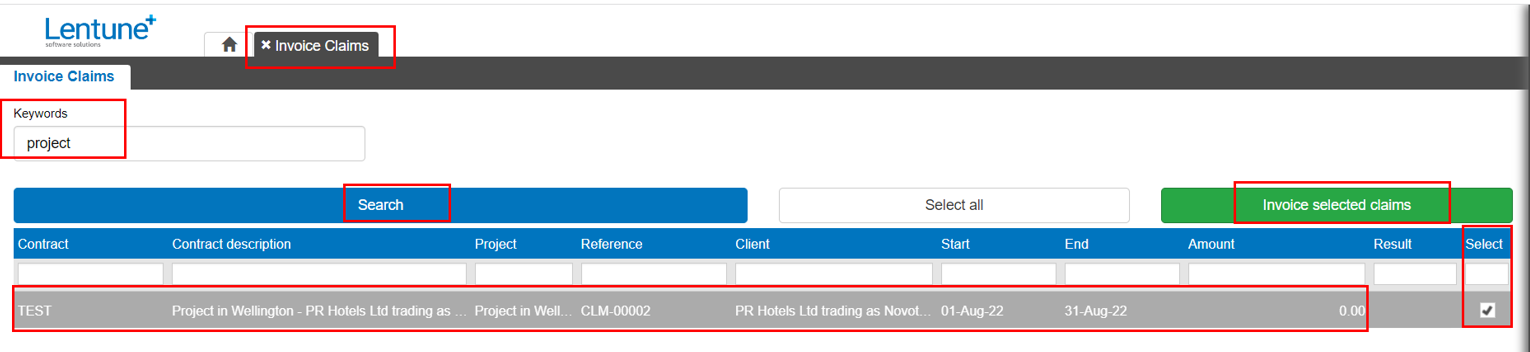
Invoice from Claims menu > Invoice Head Contract Claims
- Go to Payment Claims > Invoice Head Contract Claims.
- Select the Payment Claim you want to invoice by checking the select box on the right of the line.
- Double click on the Payment Claim to view the Provisional Invoice.
- Click Invoice selected claims.
This creates the invoice that you can now print and send. If you don't send the invoice from here, it will be sent out when your scheduled task for End of Day Email All Unsent Receivable Invoices runs.
Invoice from the Head Contract > Claims tab
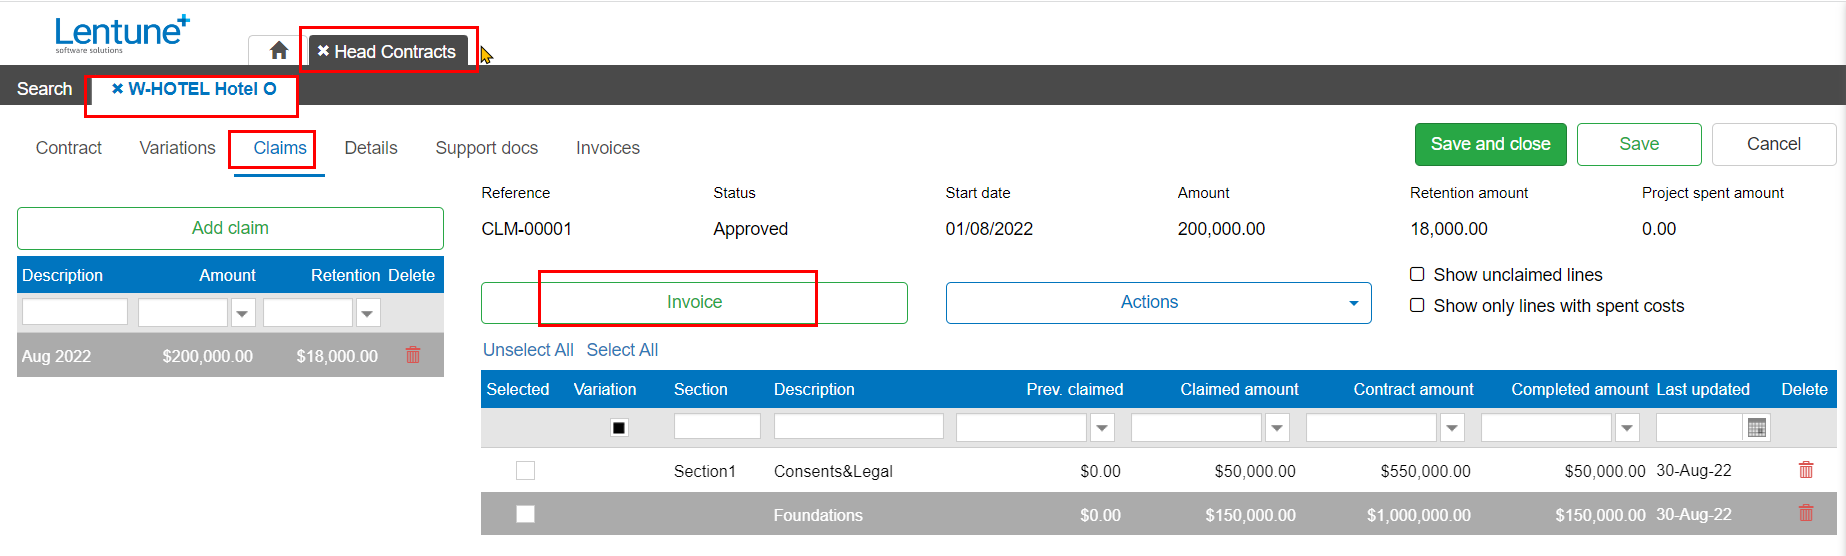
- Go to Payment Claims > Head Contract.
- Select your Contract.
- Go to the Claims tab and highlight the Payment Claim you want to work on.
The Approve button has been replaced by the Invoice button.
-
Click Invoice.
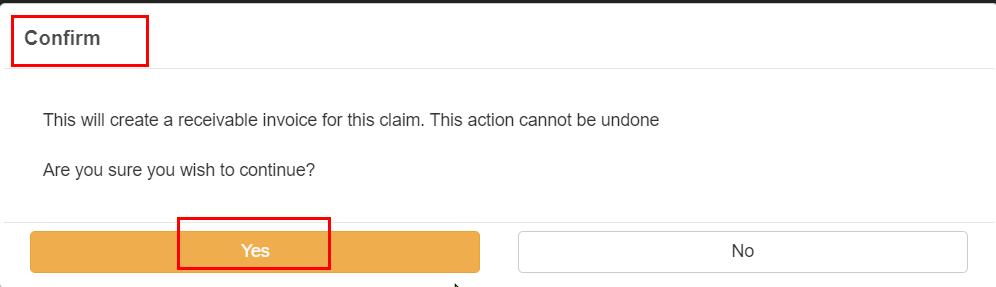
A warning message is displayed to tell you that the action cannot be undone. If you are ready to proceed:
- Click Yes.
This creates the invoice that you can now print and send. If you don't send the invoice from here, it will be sent out at the end of the day with your scheduled task to Send All Unsent Receivable Invoices runs.
View the Invoice
After you have created the invoice, you can view it from the Payment Claims > Head Contract > Contract > Invoices tab, or from the Receivables > Receivables Accounts >Receivable > Transactions tab.
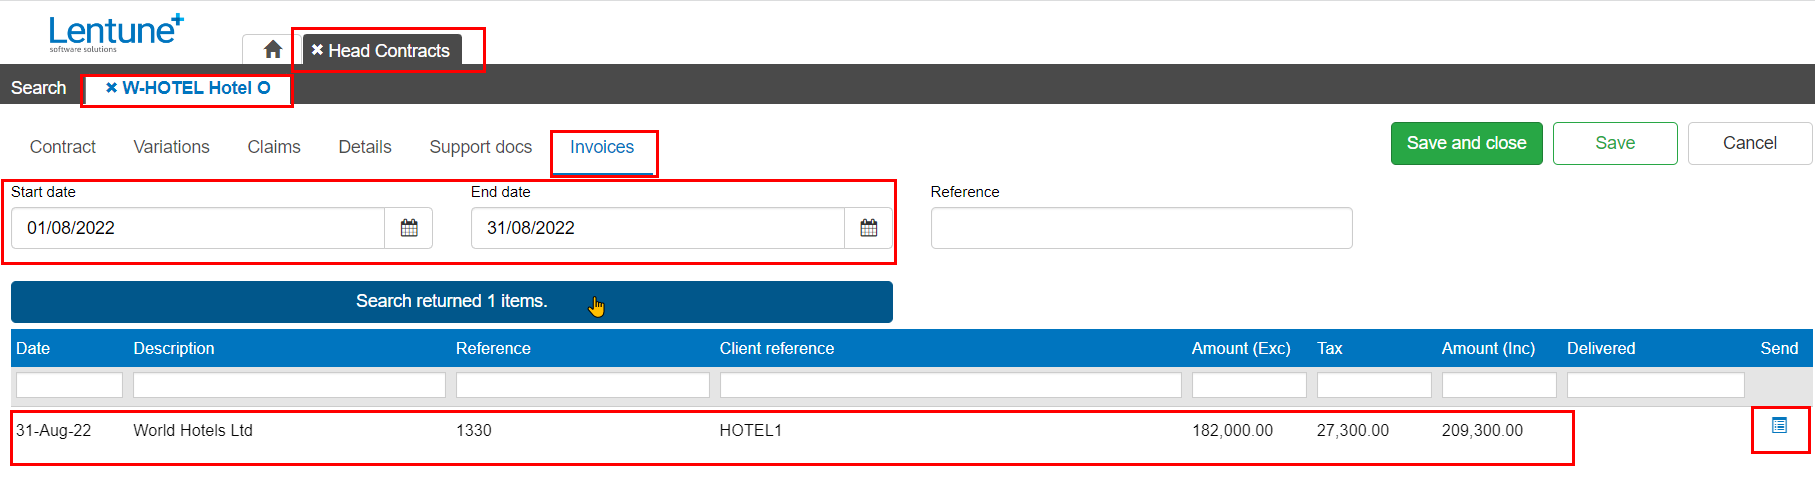
To view the invoice from the Claims menu:
- Go to the Payment Claims > Head Contract
- Select your Head Contract.
- Go to the Invoices tab.
- Enter the Start date and End date for the invoice you want.
- Click Search.
- Double click the line you want to view and print it.
- Send: You can send the invoice from here by clicking the Send icon
 on the right of the invoice line.
This will send the invoice as soon as you click the icon. The email address used is that set up on the Receivable Account on the Options tab in the field Invoice and claim delivery contact point. You do not get an option to select the email address here.
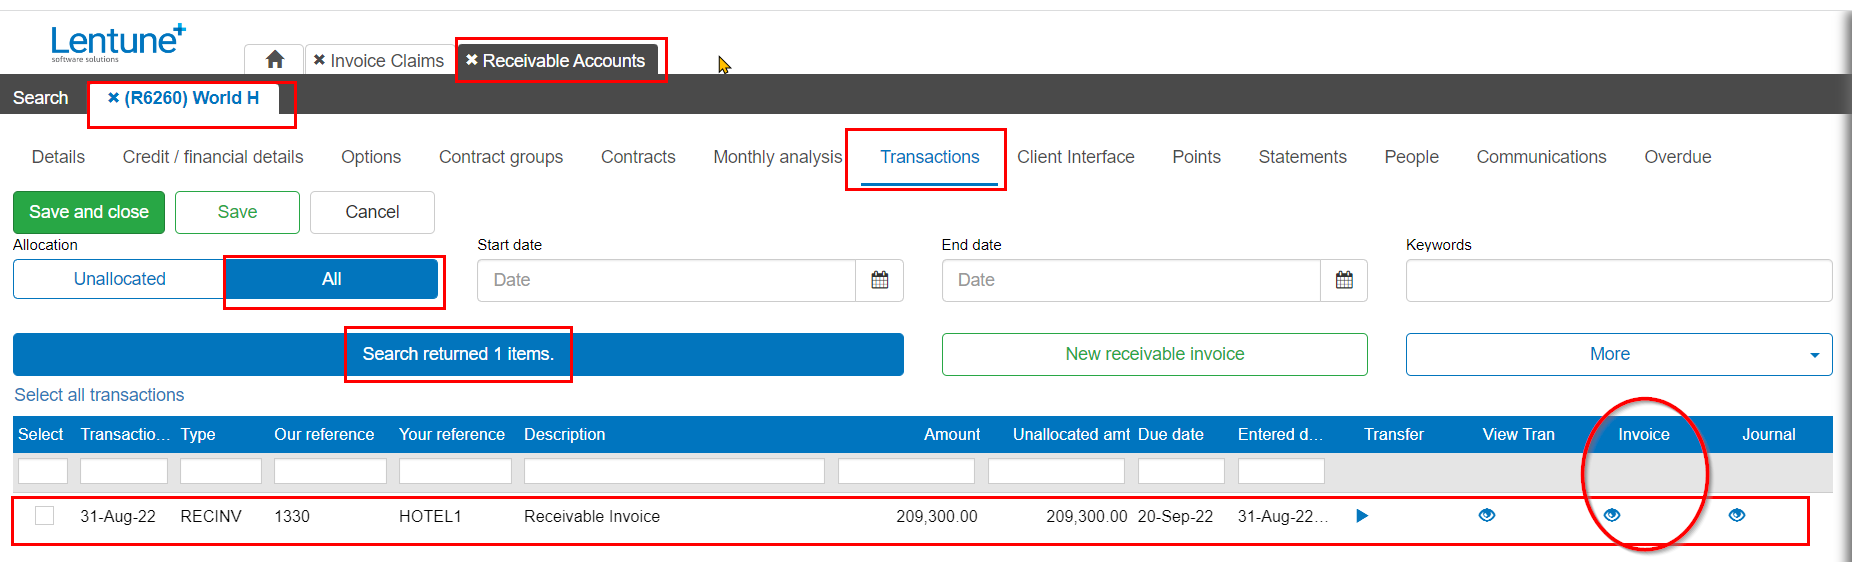
To view the invoice from the Receivables menu:
- Go to Receivables > Receivables Accounts.
- Select the Receivable account.
- Go to the Transactions tab.
- Click the Eye icon
 in the Invoice column of the grid to view the invoice.
This displays the invoice on screen, where you can print or download it.
Need more help? We’re here! We hope our article was helpful! If you need more info or want to connect, drop us an email at support@lentune.com
Thank you. We love to hear from you!
Last updated: 15 May 2023