Introduction
You are able to customise the look and location of the Approved stamp on your processed invoices, and also customise the details that are printed on the stamp.
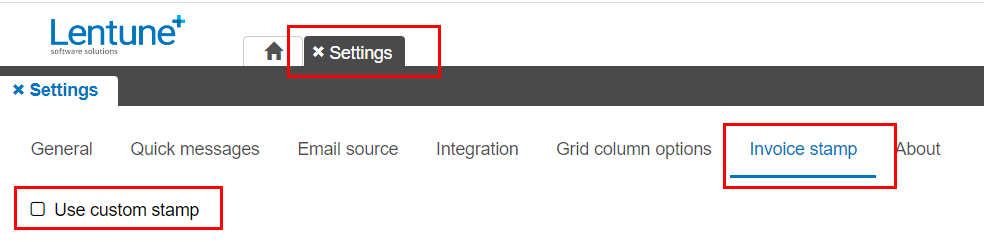
The steps to add your customised Approved stamp are:
- Check the Custom Stamp field in Settings.
- Select the Header and size.
- Add invoice header and line details.
- Preview to check the result.
- Save the changes.
Setting the Approval Stamp configuration
You can determine the location, colours and details that print for your invoice Approved stamp.
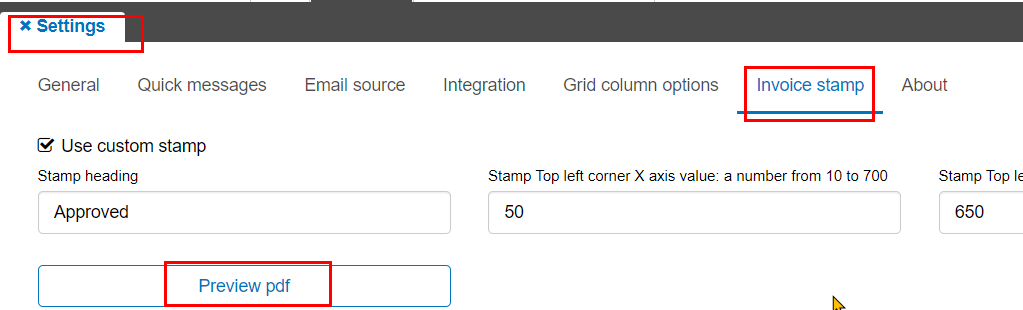
- Go to Administration > Settings > Invoice stamp tab.
- Use custom stamp: Check this field to allow the use of this feature and bring up the fields to complete for your custom Approved stamp.
Approve Stamp Header
Now you can start adding further details to appear on your custom Approved stamp. These are the standard details that will appear on every Approved stamp.
- Stamp heading: The default text is Approved. You can overwrite or add to this, e.g. Invoice Approved.
- Stamp Top left corner X axis value: a number from 10 to 700: This is the distance in pixels of the stamp from the left corner of the page.
- Stamp Top left corner Y axis value: a number from 10 to 1000: This is the distance in pixels of the stamp from the top corner of the page.
- Stamp opacity: This is the degree of fill of the stamp text (ie. how see-through it is), from 0 (transparent) to 100 (full-colour fill.)
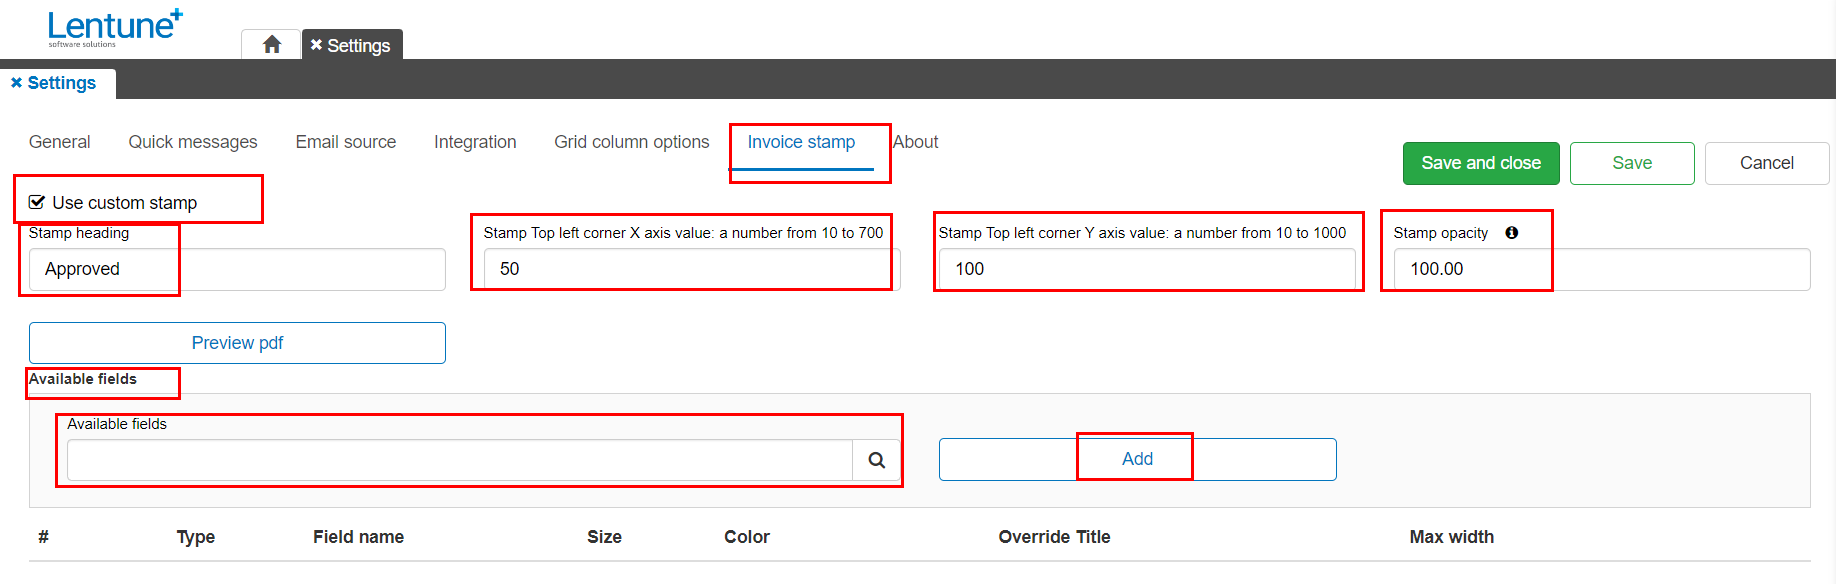
Invoice Header fields
Next you can select the invoice heading fields to display on your Approved stamp for each invoice, and how you would like them to display. When you have the header fields, you can add fields for invoice Lines if you wish.
- Available fields: Select the first field you want from the dropdown list, e.g. DsPayableAccountDsDefaultAssignedApproverStaffCode.
- Size: You can select the font size for this field to print, e.g. 14.
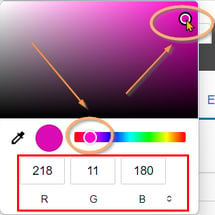
- Colour: You can select a colour for this field. To do this, click on the edit colour icon
 beside that field to bring up the colour editor.
- Click on the colour bar to select the shade you want, then click in the shading area to select the hue you want. Alternatively, you can adjust the RGB numbers below the colour grid.
There is also a colour-picker tool so you can copy colours from elsewhere (such as your company logo).
- Click on the colour bar to select the shade you want, then click in the shading area to select the hue you want. Alternatively, you can adjust the RGB numbers below the colour grid.
- Override Title: Enter the text if you wish to override the field name. e.g. Approved by. (You don't need to enter a colon after the text.) This will then print your text instead of the long field name.
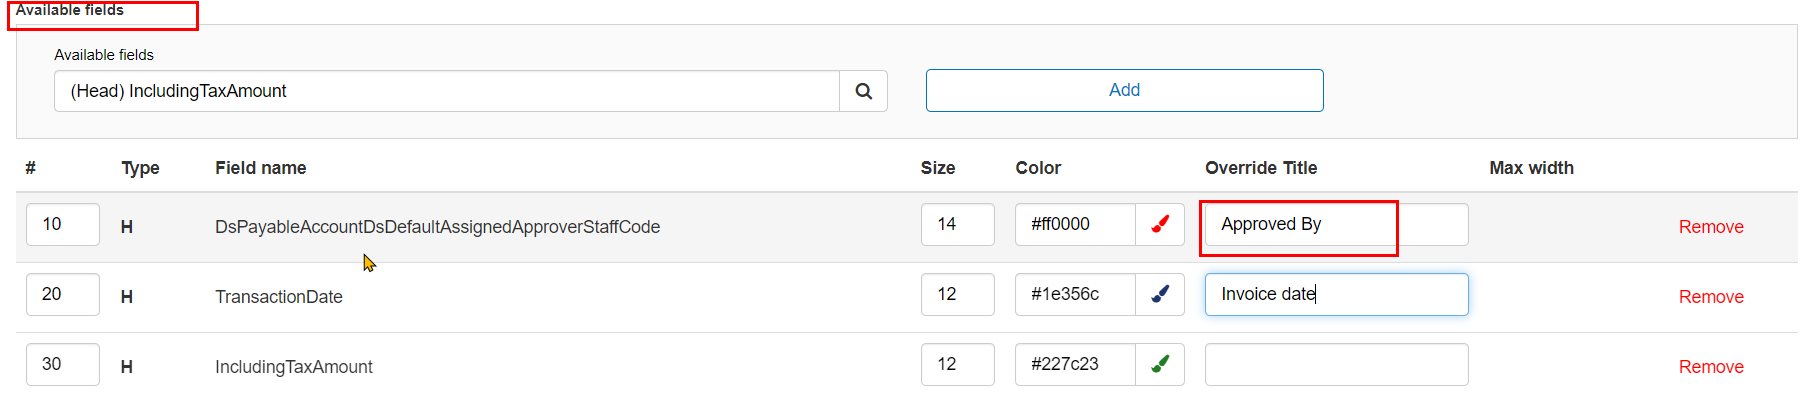
Add any further header fields you need. Note that Header fields are shown in the dropdown list with (Head) at the start of the text. You can remove a field, or re-order the fields you have added by adjusting the order of lines in the # column.
- Re-order lines: You can adjust the order of lines by changing the # number for any line you have added. Say you want the field for IncludingTaxAmount to come before TransactionDate, then you can change the # number for the field IncludingTaxAmount to 15. The system will re-order the lines and re-number them automatically.
 Change the order:
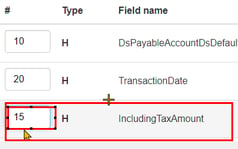
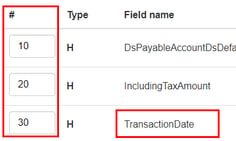
The system re-orders the lines and re-numbers them as below:
Invoice Line fields
If you want to show invoice line details in the Approved stamp, you can also select fields for the line information, set the font size, colour, and override title. You can also set a field for Max Width, to avoid having the Approved stamp covering too much of your invoice. Note that invoice line fields are shown in the dropdown list with (Line) at the start of the text.
Invoice Line fields will automatically be placed below the Invoice Header fields in this grid and in the Approved stamp.
- Field name: Select the field from the dropdown list.
- Size: Select the font size for this field.
- Colour: Select the colour for this field.
- Override Title: Enter text for this field heading.
- Max Width: Enter the maximum width for this field. Note that this is in pixels, not characters.
- Add further fields as required.
- Click Save.
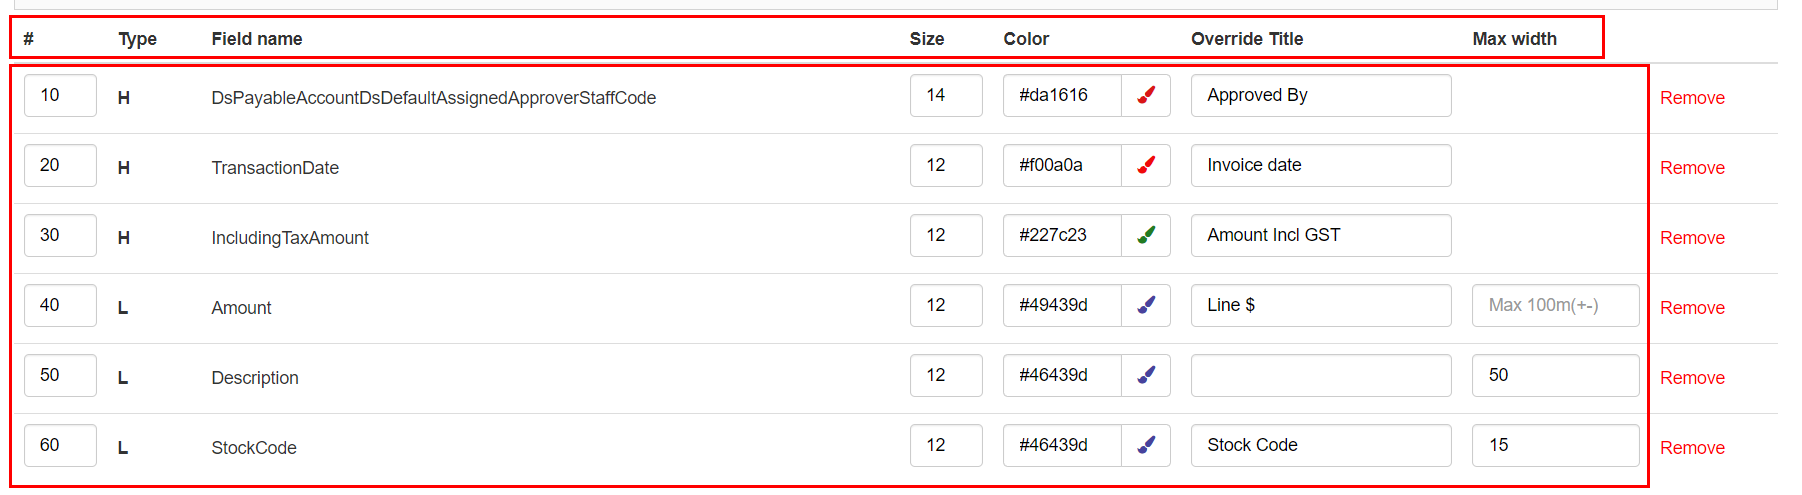
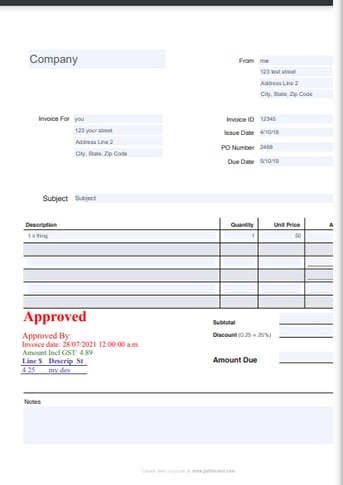
Your completed settings might look something like this, depending on the fields you wish to show:
Preview
At any stage of your editing, you can preview how the Approved stamp will appear on an approved invoice.
- Click Preview pdf.
Now you can see what the Approved stamp will look like and where it will be located on your invoice. This helps you to see if any changes are needed to show the Approved Stamp correctly.
The preview screen will show you how the layout of the selected fields will be printed.
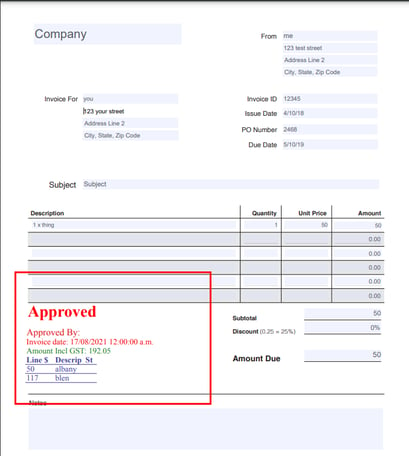
In the Approve invoice screen, the actual details of the invoice will print when you have approved the invoice, so it will look something like this:
Need more help? We’re here! We hope our article was helpful! If you need more info or want to connect, drop us an email at support@lentune.com.
Thank you. We love to hear from you!
Last updated: 6 September 2022