Introduction
Where you may need to order materials in advance of using them, you might store them either on-site or off-site. You need to correctly record these items and where they are stored and keep the required documentation for them.
The steps are:
- In your Head Contract line, add Onsite/Offsite details for the materials. Ensure that the Cost Codes used match your accounting system.
- Add supporting documents, such as your Schedule, Insurance certificate and photos of the materials stored.
- When you have been invoiced for the materials, you can enter a claim line for them so that you can invoice your customer.
Add Onsite / Offsite Amount to your Trade Summary Line
You can add an Onsite/Offsite amount to an existing Trade Summary line, or create a new line for the amount.
- Go to Payment Claims > Head Contract.
- Select your Head Contract and select the Trade summary line you want to add the Onsite/Offsite amount to.
- Click Onsite/Offsite value.
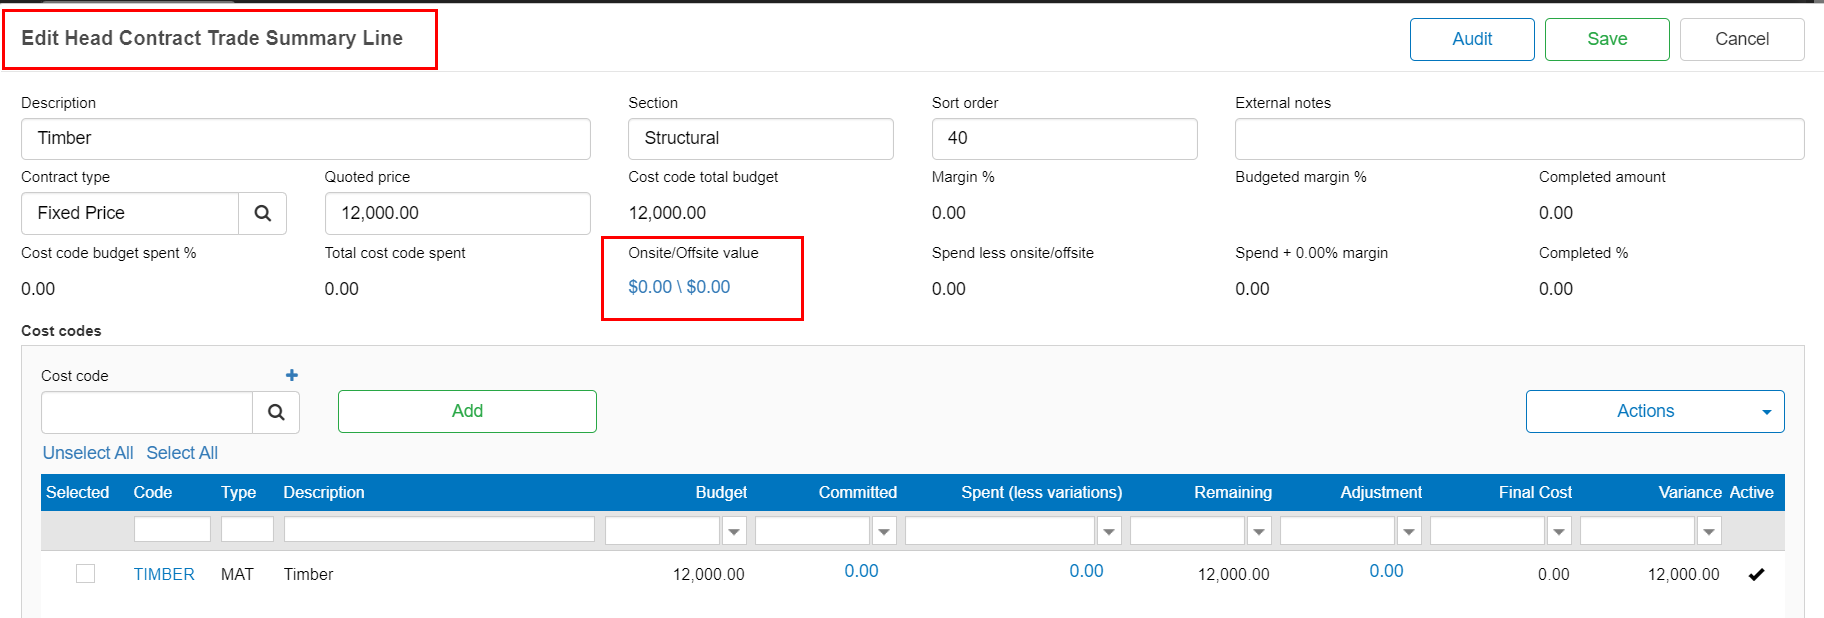
This takes you to the Onsite/Offsite Items screen.
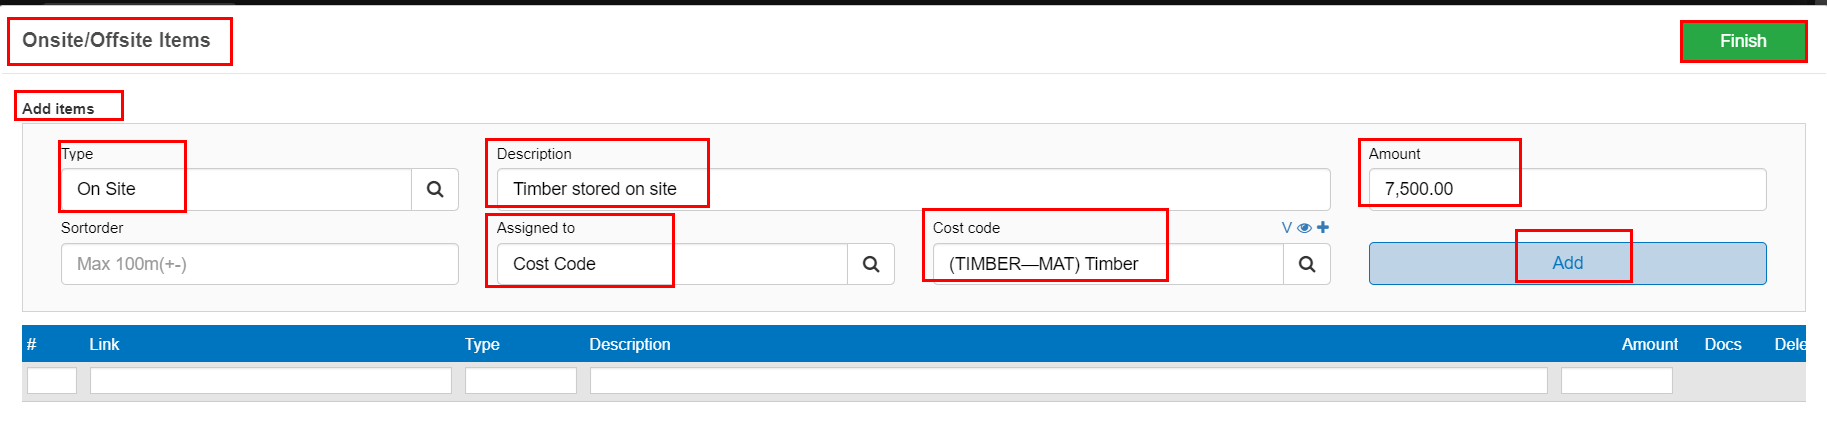
In the Add Items section:
- Type: Select Onsite or Offsite from the dropdown list.
- Description: Enter a Description for the materials.
- Amount: Enter the Amount for this item.
- Sort order: Enter a sort order if required.
- Assigned to: Select one of Sub contract line, Cost Code or Budget variation from the dropdown list. This selection determines the next field, which will change to Sub contract line, Cost Code or Cost code variation, depending on what your selection for the Assigned to field is. This example shows Cost Code.
- Sub contract line, Cost Code or Cost code variation: Select the appropriate code from the dropdown list, depending on what you have selected in the Assigned to field.
- Click Add.
- Add any more lines as necessary.
- Click Finish, or continue as below to add Supporting Documents.
- Click Save.
The Onsite / Offsite value for the Trade Summary Line will now show the value entered.
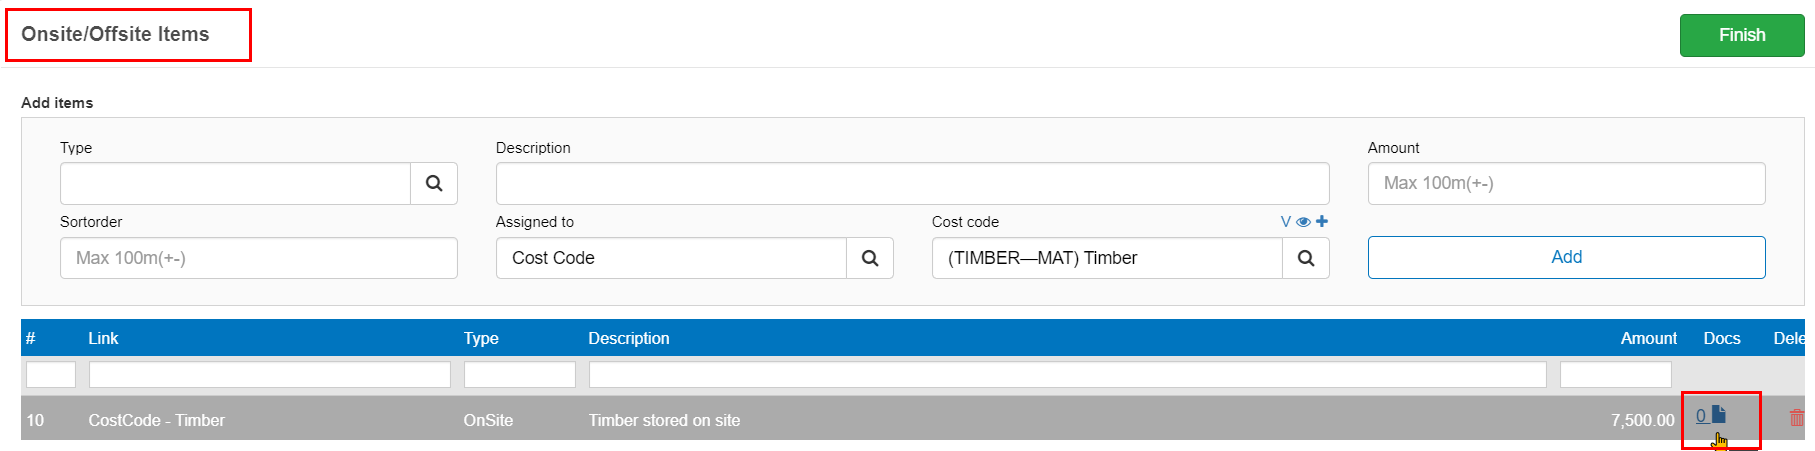
Add Supporting Documents
In the Onsite/Offsite Items screen, the lines you have added will be displayed. You can now add any supporting documents.
- Click the Document icon
 for the line. Note that the Document Count is also displayed beside the Document icon.
In the Support Documents screen:
- Click New file.

- Select the file/s you wish to upload. You can upload multiple files at once.
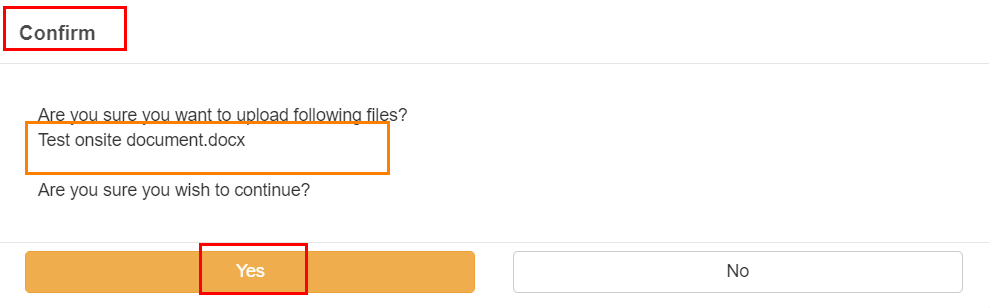
In the Confirm screen:
- Check that the files are the correct ones that you want.
- Click Yes.
The documents will be uploaded and the document count will now update.
- Click Finish.
- Click Save.
Creating a Claim with Onsite/Offsite Items
When you are creating a claim, (refer to Create a Payment Claim for your Head Contract), you can claim for purchased materials held onsite or offsite.
- Go to Payment Claims > Head Contracts.
- Select the Head Contract you want.
- Click the Claims tab.
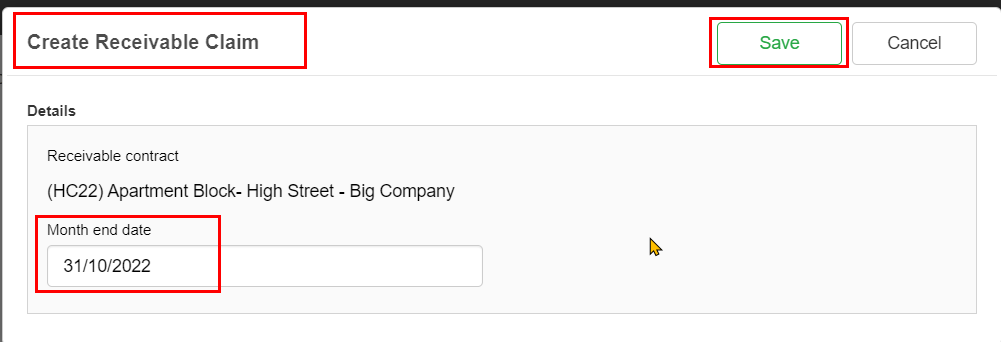
- Click Add Claim.
- Month end date: Enter the date for this claim.
- Click Save.
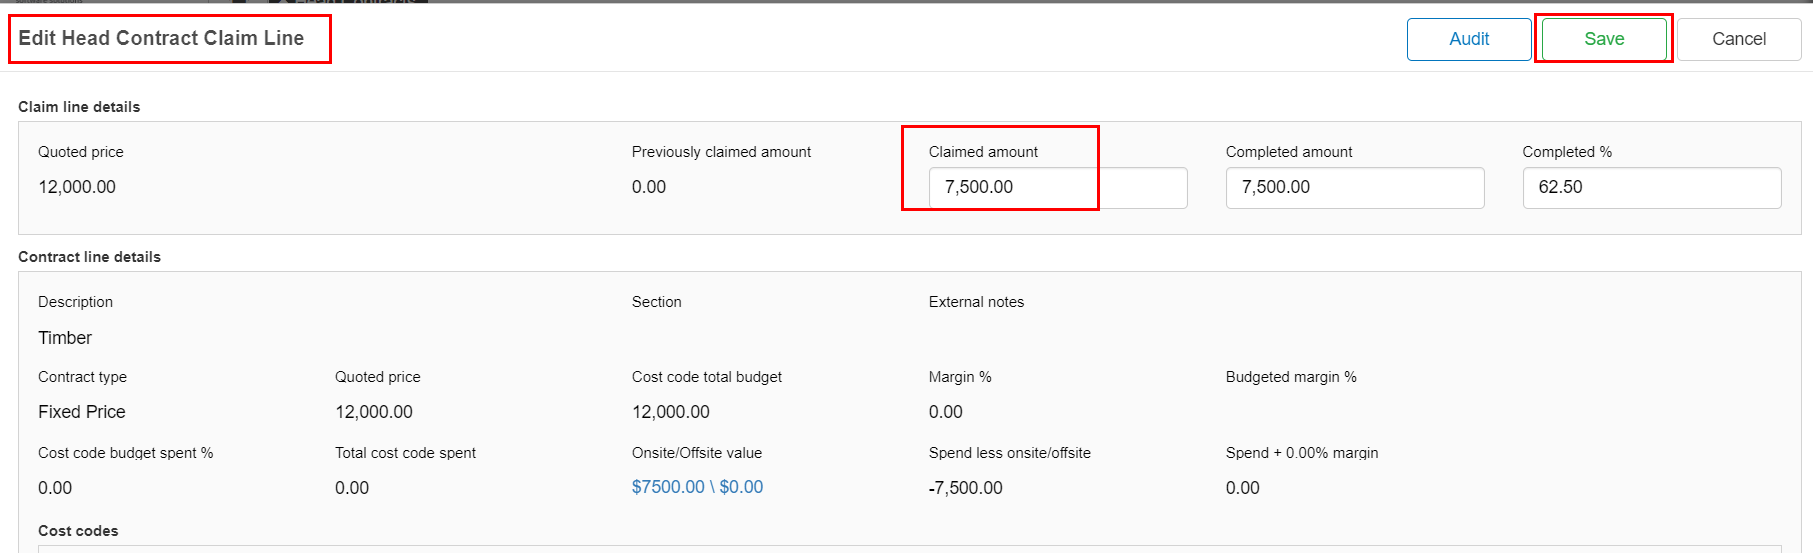
On the right of the screen, the Trade Summary lines are displayed. Here you can select which lines you want to claim for. You would expect the invoices to have arrived and the Spent amount that has been invoiced to you to be displayed in the lower part of the screen.
- Select the line with the Onsite/offsite item you are invoicing.
- Claimed amount: Enter the claimed amount.
- Click Save.
Print, Preview or Download the Claim
On the front screen of the Head Contract, you can now preview the Payment Claim Summary Form.
- Click Actions.
- Select Preview.
This will display the claim with the onsite /offsite amounts included.
Need more help? We’re here! We hope our article was helpful! If you need more info or want to connect, drop us an email at support@lentune.com.
Thank you. We love to hear from you!
Last updated: 16 February 2023