Project Defaults: Default Project Type
Project Defaults: Create new Project with Master Cost Code
Project Defaults: Global Cost Type Visibility
Adding a new Project with Cost Type visibility
Overview
Cost Codes can be used throughout the Lentune system to allow you to categorise expenses for Projects. This can be used for Project reports and for exporting to your job cost system; e.g. Costcon and Jobpac.
To help guide your Users to apply appropriate Cost Codes in the various tasks they perform, you can mark selected Cost Types to be hidden in various modules. This can be set as a global flag in Settings for Project Defaults, and these settings can be edited in individual Projects.
The modules that can be flagged are: Purchase Order, Invoice Automation, Time Sheet and Expenses.
This results in a much smaller list of Cost Codes in the selection list to choose from, making it more efficient for your Users. Any Cost Code belonging to the Cost Type defined will be hidden from that module, although they can be made visible to allow for exceptions.
Additionally, the Project Defaults setting Create new Project with Master Cost Codes also allows you to copy Master Cost Codes when creating new Projects to facilitate setting up new Projects with appropriate Cost Codes.
Settings: Project Defaults
The Project Defaults settings allow you to apply global settings that will then be applied to new Projects that are set up.
- Start at Administration > Settings > General tab.
- Scroll down to the Project Defaults section on the right hand side.

The settings are:
We'll take you through the settings now.
Project Defaults: Default Project Type
The default Project type can be selected as one of Option, Standard or Asset. These options are system defined. When setting up a new Project, this default will be used. However, it can be changed to another type on the Project if required.
Data may be exported to your Job management system, such as CostCon or Jobpac, and it will be marked as Standard or Asset type.
- Select the Default Project Type that you expect the majority of your new Projects to use. Usually, this will be Standard.

Project Defaults: Create new Project with Master Cost Code
When this field is checked, any new Projects will be created with a Project-specific copy of the Master Cost Codes that exist in your Lentune system.
What are Master Cost Codes?
Master Cost Codes are Cost Codes that are used as a template for setting up a new Project. Master Cost Codes will not have a Project attached. When you copy them to a Project, a new code is created which is specific to your Project. You can then apply budgets to that Cost code which are specific to that project.
Refer here to read about Adding Master Codes to Projects.
To create new Projects with the Master Cost Codes that exist in your system:
- Check the field Create new project with master cost code.

Project Defaults: Global Cost Type Visibility
You can establish global settings to determine selected Cost Types, and therefore the associated Cost Codes, to be hidden in the specified modules, e.g. Purchase Orders, Invoices, Time Sheets or Expenses.
This assists your Users to select the appropriate Cost Codes when performing their daily tasks. For example: In the Purchase Order or Invoice Automation modules, you can hide Cost Types that may not apply to these areas. Then the Cost Codes that have been attached to the Project that DO apply to the module will be displayed in the Cost Code selection field.
However, other Cost Codes for the Project can still be selected if required, by unticking the Purchase Order Cost Code only box when you are selecting the Cost Code. This example is from a Project in the Purchase Orders tab. Here you can search for Purchase Orders by a selected Cost Codes or add a new Purchase Order and select a Cost code that has been assigned to thi\s Project.

To hide Cost Types in various modules:
- From the Administration > Settings > General tab, scroll down to the Project Defaults section on the right hand side and click Cost Type visibility.

In the Global Cost Type Visibility Settings screen:
In the section for each module, you can select the Cost Types that do NOT apply to each specific module. Therefore the Cost Codes associated with those Cost Types will be hidden when Users are working in those particular modules, making it easier for them to select the required codes.
In the Purchase order module section:
- Select a Cost Type that you wish to hide.
- Click Add. (You can click Remove to later remove a Cost Type from the hidden list.)
- Repeat for any further Cost Types to exclude.
This will leave the appropriate Cost Types and their associated Cost Codes easily accessible for Users to select.
- Repeat these steps for the other module sections.
When you have completed all modules:
- Click Finish.

Adding a new Project with Cost Type visibility
When adding a new Project, the default settings for Cost Types that you have hidden for each module will automatically be copied to the Project.
This helps your Users to more easily find and select the appropriate Cost Code when they are working in Purchase Orders, Invoices, Time Sheets and Expenses.
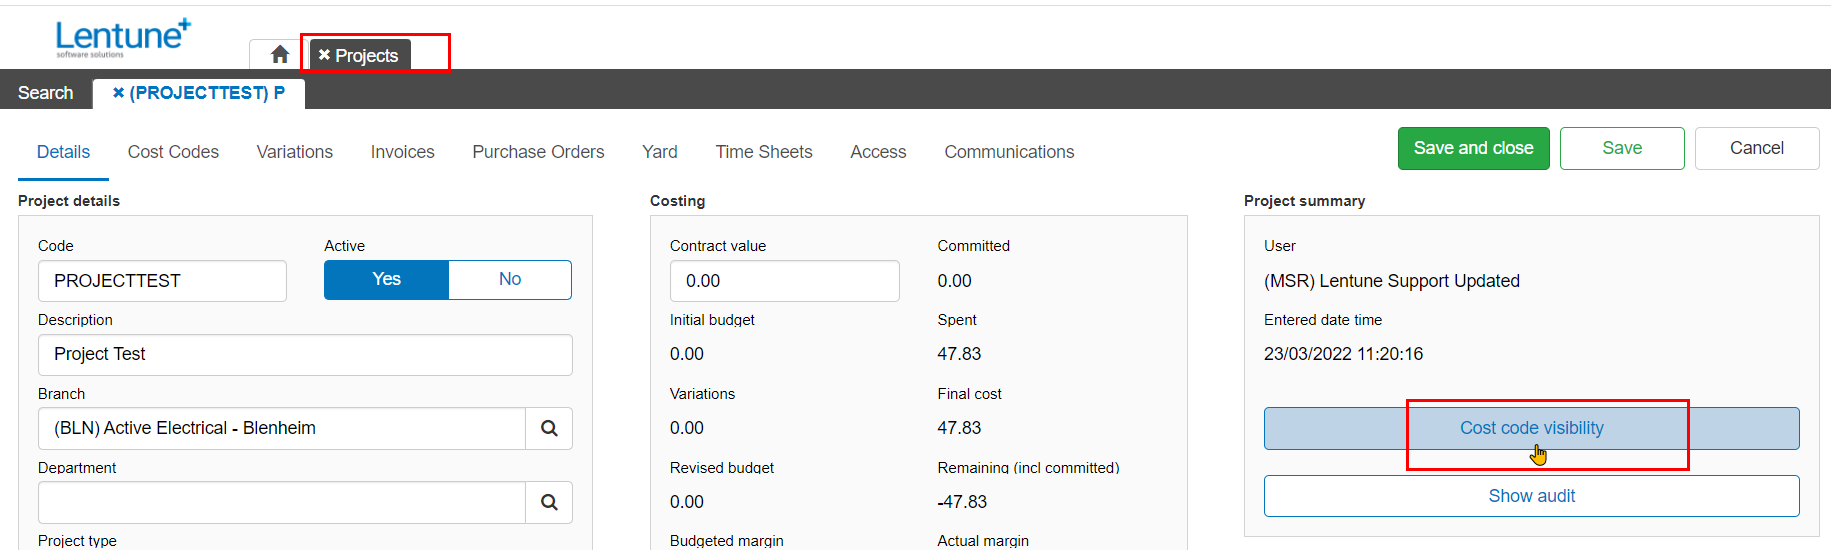
You can view this in the Project > Details screen.
- Click Cost type visibility.
You may add and edit these settings for any individual Project.
This allows you to set up a project which has different exclusions to the default settings.
Project Defaults: Apply Defaults to Historical Projects
If you want to update your existing Projects You can apply the new rules to any Projects that are active but not yet complete.
To do this:
- From the Administration > Settings > General tab, scroll down to the Project Defaults section on the right hand side.
- Click Apply defaults to historical projects.

Then to confirm:
- Click Yes.

Applying a Cost Code to a Purchase Order or Invoice
Let's look at the Purchase Order example.
When you have set up the Cost Codes for a particular Project, and you now want to add a Purchase Order or code an Invoice for that Project, you can easily select from the list of Cost Codes that apply to that Project.
The box above the Cost Code selection Purchase Order Cost Code only is checked by default. When this box is ticked, only the Cost Codes for Purchase Orders for this Project will be available for selection.
However, the User is able to untick the Purchase Order Cost Code only box if they wish to view and select a Cost Code that belongs to this Project but that has not been specifically allowed for Purchase Orders.
- From the Invoice Automation > Purchase Orders menu, or the Project > Purchase Orders menu:
- Add a new Purchase Order as usual, and select the Project that it belongs to.
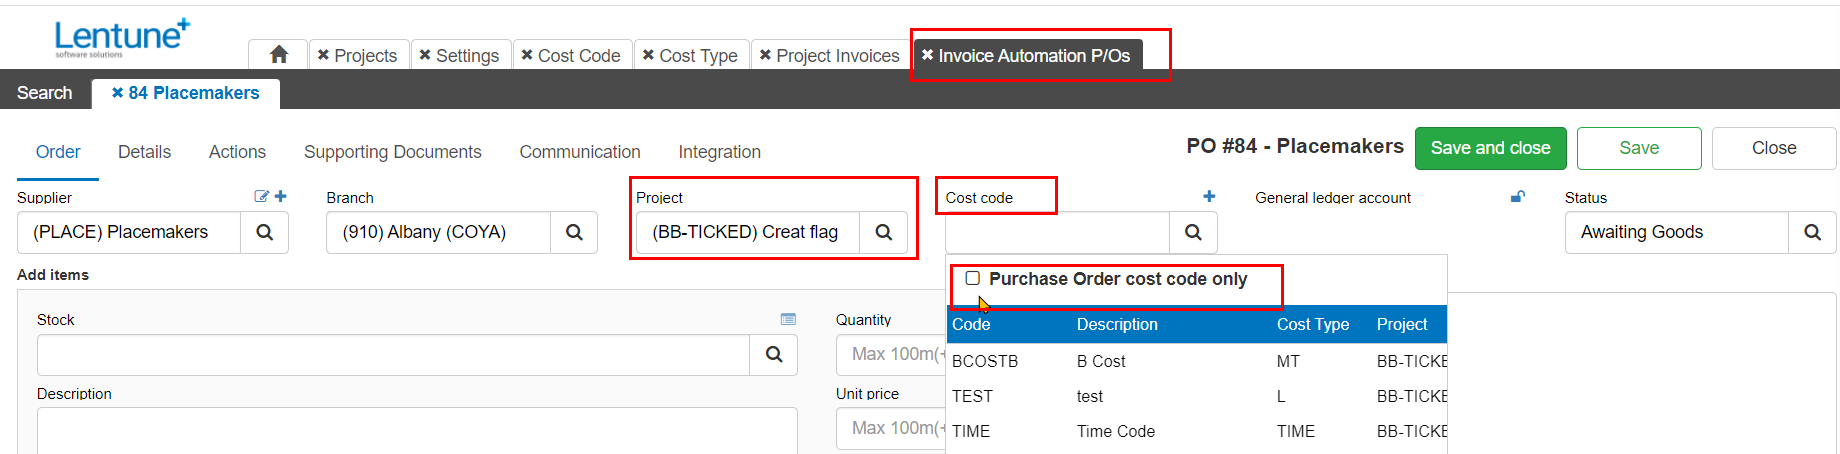
In the Cost Code field, you can now elect to view only the Cost Codes that been allowed (i.e. not hidden) for Purchase Orders in the Cost Type visibility screen.
This is the default view. Alternatively, you can untick the box Purchase Order Cost Code only and then view all Cost Codes that have been attached to this Project, regardless of whether or not they have the general restriction to not appear for Purchase Orders
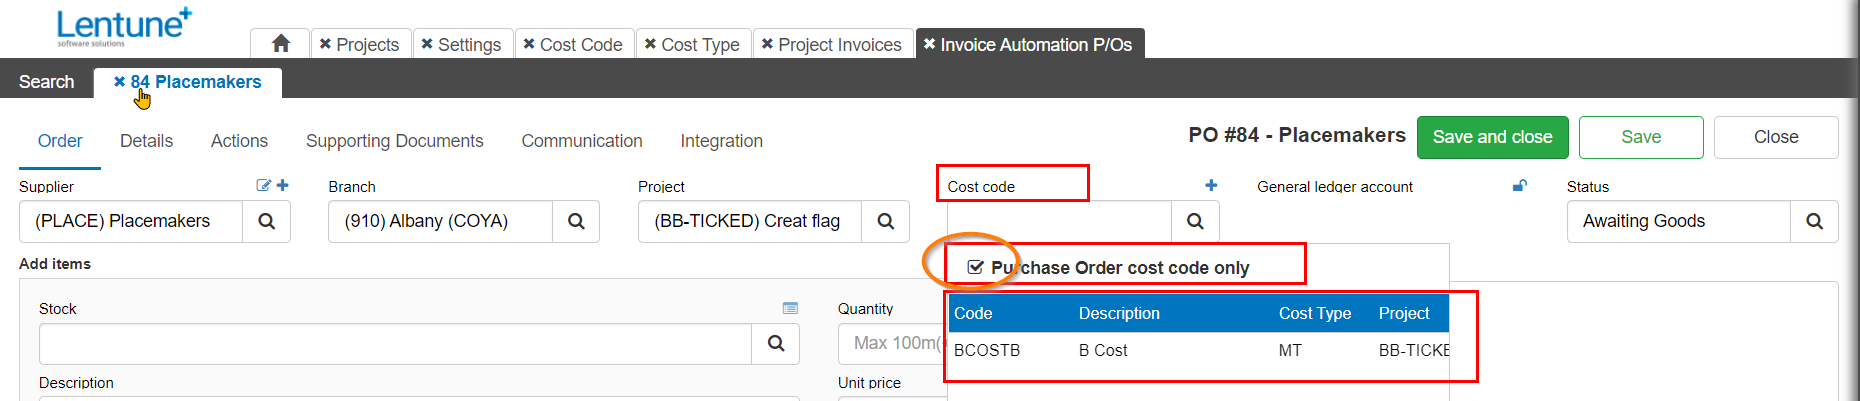
The default is for the box to be ticked. Therefore when you click the search icon in the Cost Code field, you will first see only the Cost Codes that are applicable to Purchase Orders.
However, if you wish to see the list of all Cost Codes that have been attached to this Project, you can untick the Purchase order cost code only box.
Need more help? We’re here! We hope our article was helpful! If you need more info or want to connect, drop us an email at support@lentune.com.
Thank you. We love to hear from you!
Last updated: 10 September 2024