Overview
When a new person needs access to Lentune you must set up a User profile for them.
A new User must have appropriate security settings to allow them access to the areas they need. This is managed by the Access Personas, and the Security Groups and Security Roles. If the new User tries to access an area that they have not been assigned permissions for, they will see a warning message and they will not be allowed access.
Lentune Users may be Staff which requires additional settings as below.
You can read about the new workflow wizard that steps you through the easy process to create a User here.
Setup a User and Details
- From the Settings > User, or Administration > Users menu, click New User.
In the Create New User screen:
- Add a Code, First name and Last name.
- Click Confirm.

This takes you to the Details screen.
- Add the Email address for the new User.
TIP: If you want to add a person as a Crew Member who will not need access to Lentune themselves, but rather a Crew Manager will be entering Time sheets for them, you can set them up without an email address and some other details. Refer to Add a new Time Sheet User as a Crew Member to read how to do this.
You can also set a password here for the new User if you wish. Alternatively, the User can set their password by clicking Forgot Password on the Login screen.
NOTE: Once the new User has been created, you can click Send Invite in the User search list. This will send out a welcome email to that person. Then they can click on the link in the email to go to the login screen, and click Forgot Password to set up their own password, and they will be able to login.
- To set a password here, click Reset password.

This takes you to the Reset Password screen.
- Enter the Password in the New password and Confirm password fields.
- Click Confirm, then click Save.
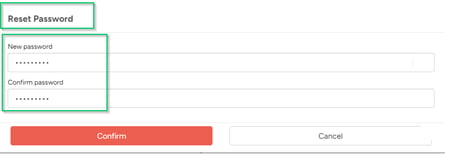
NOTE: Passwords must be at least 8 characters and contain a combination of uppercase letters, lowercase letters and numbers or special characters.
Staff settings
Staff Users require further details to be set up to enable access to the areas they need.
NOTE: If the User is NOT a staff member, but rather one of your customers using the Customer Portal, then you must ensure that the Staff member setting is set to NO.
- From the Users screen, click Staff.
- Ensure that Staff is set to Yes.
- Select a Default branch from the dropdown list.
- Select a Default Access Persona from the dropdown list.
- In the Contact details section, ensure that the Email address appears.
- Complete any other fields required.
- Click Save.

If the Staff Code already exists in your Payroll system
When you create a new User and you're making them a Staff member, if the Staff code already exists (perhaps in your linked Lentune Payroll system), you will see a warning that the Staff code already exists. The user will have been created but it won't let you make it a Staff member.
- If you closed out of the User edit screen, search for and select the User in the search list.
- Go to the Staff Tab.
- Staff member: Click Yes
- Branch: Select the Branch for this person
- Email address: Add the email address for this person.
- Scroll down in the Staff Details section.
- Click Associate existing staff.
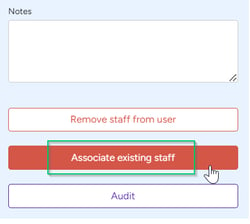
- This will associate the new User code with the existing Staff code.
- Click Save and close.
Time Sheet User
You can create a new user as a Time Sheet user, or you can associate a new Time Sheet user with an existing user who has not previously been set up to use Time Sheets.
If the Staff member User is a Time sheet User, you can now set the Time sheet settings.
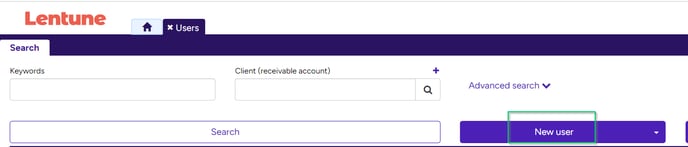
From the User front screen:
- Click the down arrow to the right of New User.
- Click New Time Sheet User.

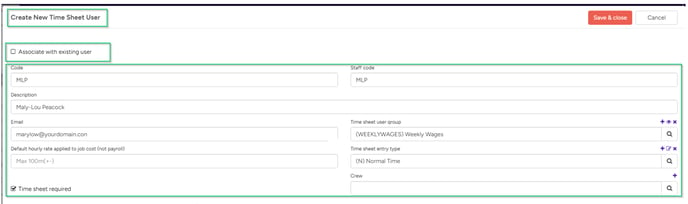
In the Create New Time Sheet User screen:
-
Associate with existing user: Check this field if the user already exists in Lentune, otherwise leave it blank.
-
User: Select the User from the dropdown list if they already exist, or enter a new Code here.
-
Ensure that Time sheet required is set to Yes.
-
Default hourly rate applied to job cost (not payroll). This field can be set to zero. It is used only for job costing and does not relate to payroll.
-
Select a Time sheet user group from the dropdown list.
-
Time sheet entry type: This will automatically default from the Time sheet user group.
-
Click Save and close.
To edit any Time Sheet settings for the User:
Once you have saved the Time Sheet settings, the User screen will now display a tab for Time Sheet User. To view or edit fields:
-
Go to Users and select the User.
-
Click the Time sheet user tab.
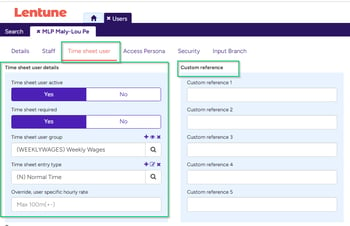
In the Custom references section, these fields are used for our custom exports which allow you to export the correct User details to different systems. If these are required, your Lentune onboarding / support team will advise you when they are setting up your export.
Security Roles and Access Personas for Time sheet Users
Click here to read details about Security Roles and Access Personas for Time sheet Users.
Access Persona
Add an Access persona for the new User.
- Click Access Persona.
- In the Quick add access grants section, you can assign the Access Persona/s that this User will require.
You can also apply these at Company, Branch level or Project level.
- Click Save.
Refer to Access Personas for more details about Access Personas for Users.

Security Group
Add a Security group for the new User.
- Click the Security tab.
- In the Quick add security groups section, you can assign the Security Groups that this User will require.
Refer to Assign or Remove a User to / from a Security Group for more details.
- Click Save.

Need more help? We’re here! We hope our article was helpful! If you need more info or want to connect, drop us an email at support@lentune.com.
Thank you. We love to hear from you!
Last updated: 9 September 2024