Introduction
We'll take you through the steps to create a custom export to email Invoices from Yard Bookings, with a PDF file for each invoice and a CSV file of all selected invoices. In this case, the export is for one Receivable Account.
Your Custom Export allows you to specify the data and the format that you want to export.
To create the Yard Invoices and email them using this custom export, refer to Export Invoices from Yard Bookings.
Create a Custom Export
When creating a Custom Export for Invoices from Yard Bookings, the export will be for one Receivable Account at a time, although you can use the same export for other Receivable Accounts.
- Go to Administration > Custom Import / Export.
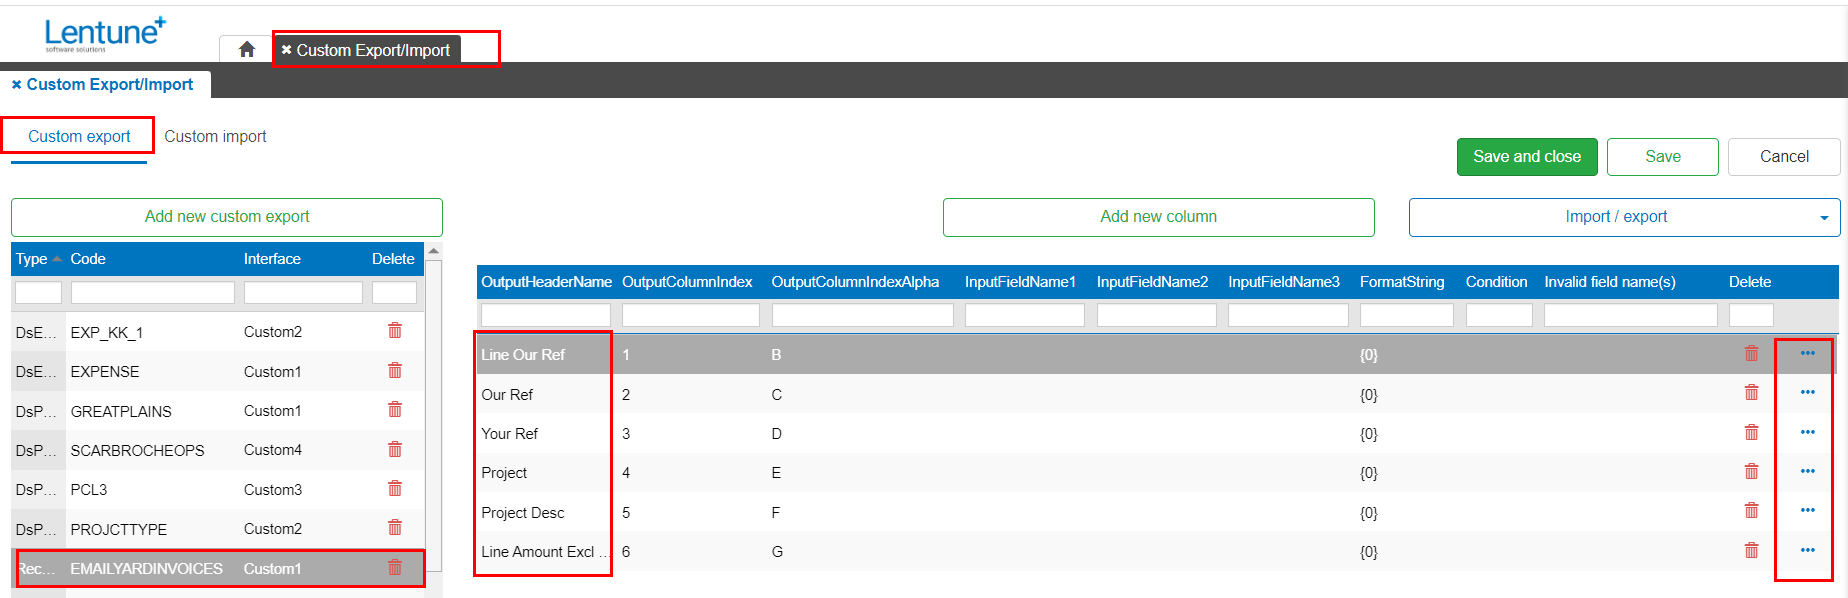
On the Custom Export tab:
- Click Add new custom export.
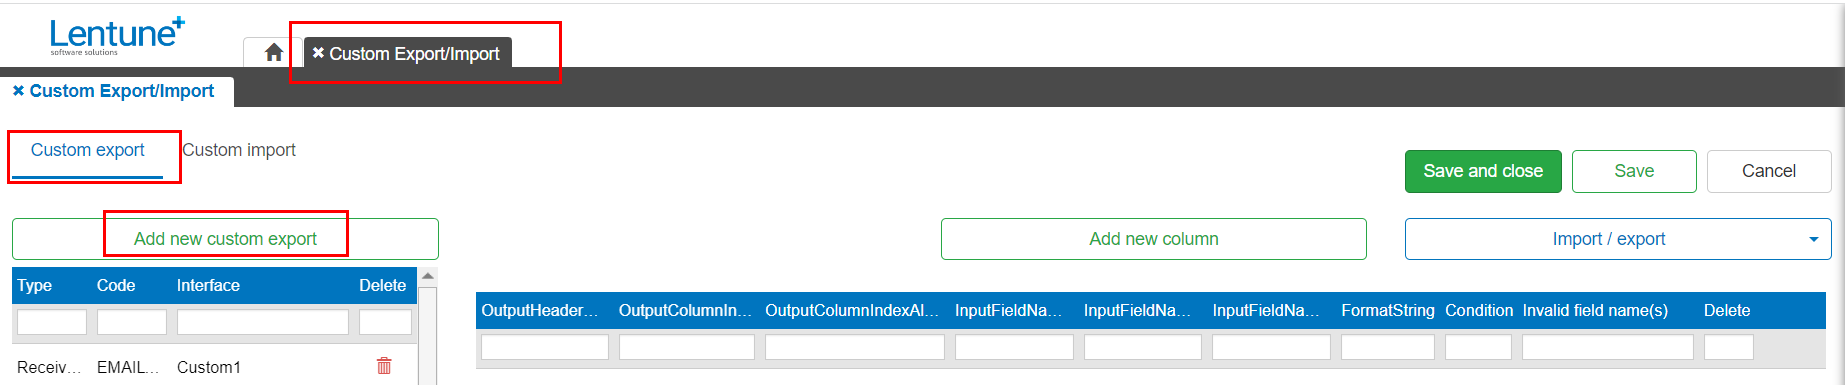
This takes you to the Create Custom Export screen.
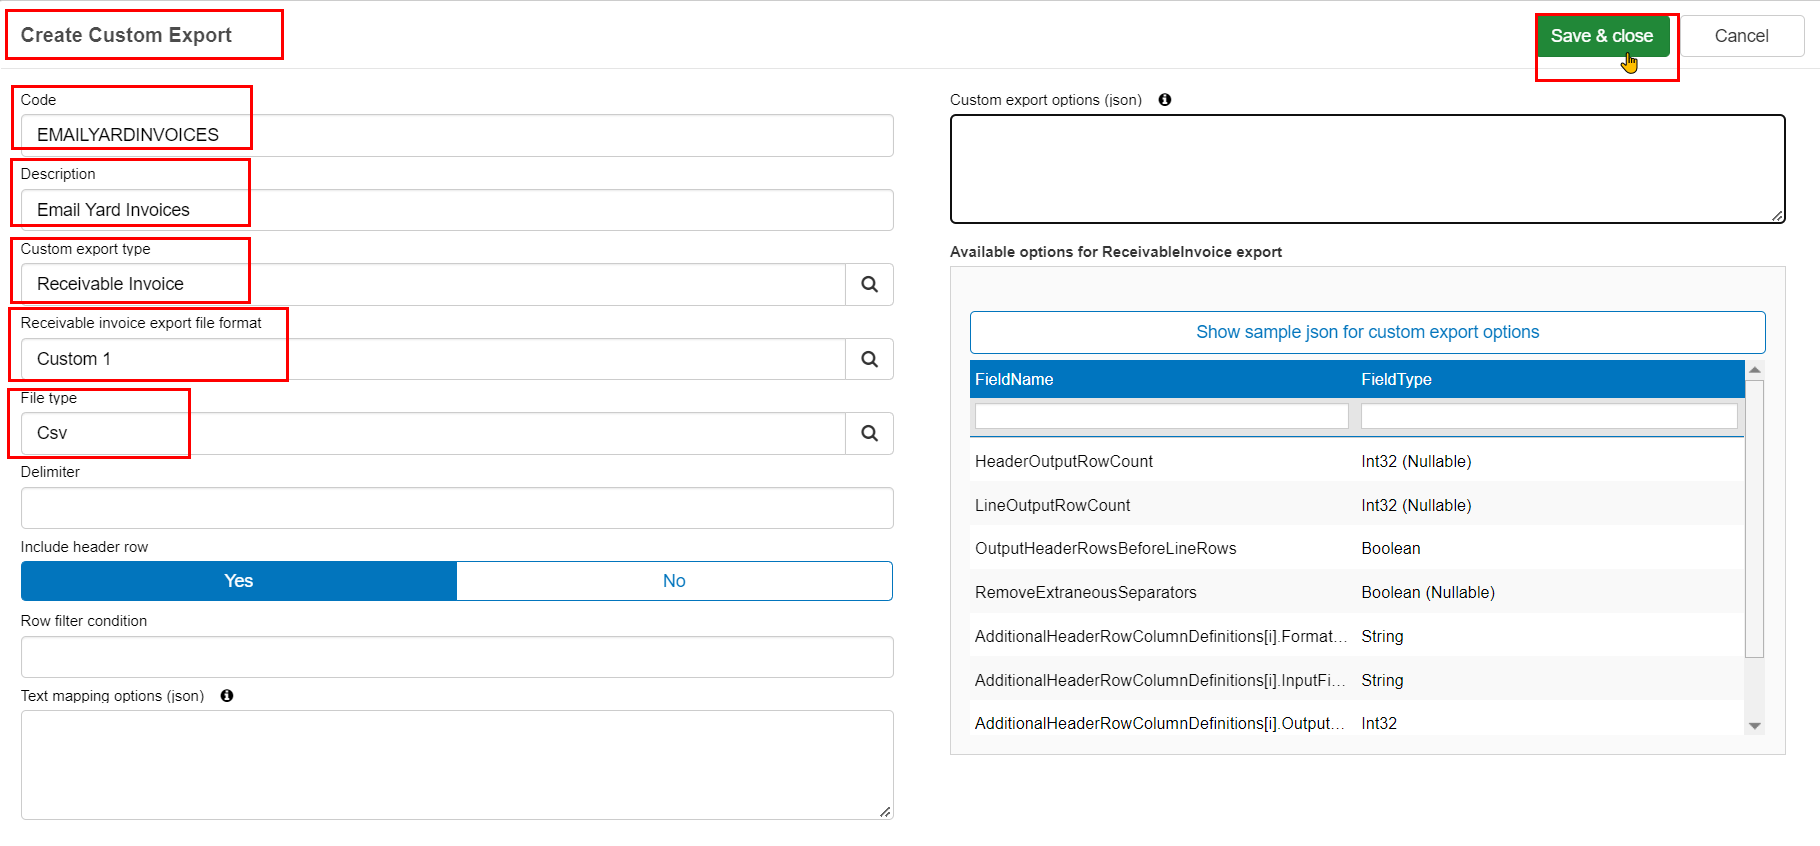
- Code: Enter a Code for this new custom export. In this example, we have called it EMAILYARDINVOICES.
- Description: Enter a Description for this new custom export.
- Custom Export Type: Select Receivable Invoice from the dropdown list.
- Receivable invoice export file type: Select Custom 1 from the dropdown list.
TIP: You can have up to 9 different file interface types for any Custom Export Type.
- File Type: Select the file type you want, e.g. CSV.
- Click Save & close.
Your new Custom Export will now appear in the list on the left of the screen. Now you can add the columns you want to include in the export.
- Highlight the new Custom Export in the list.
- Click Add new column.
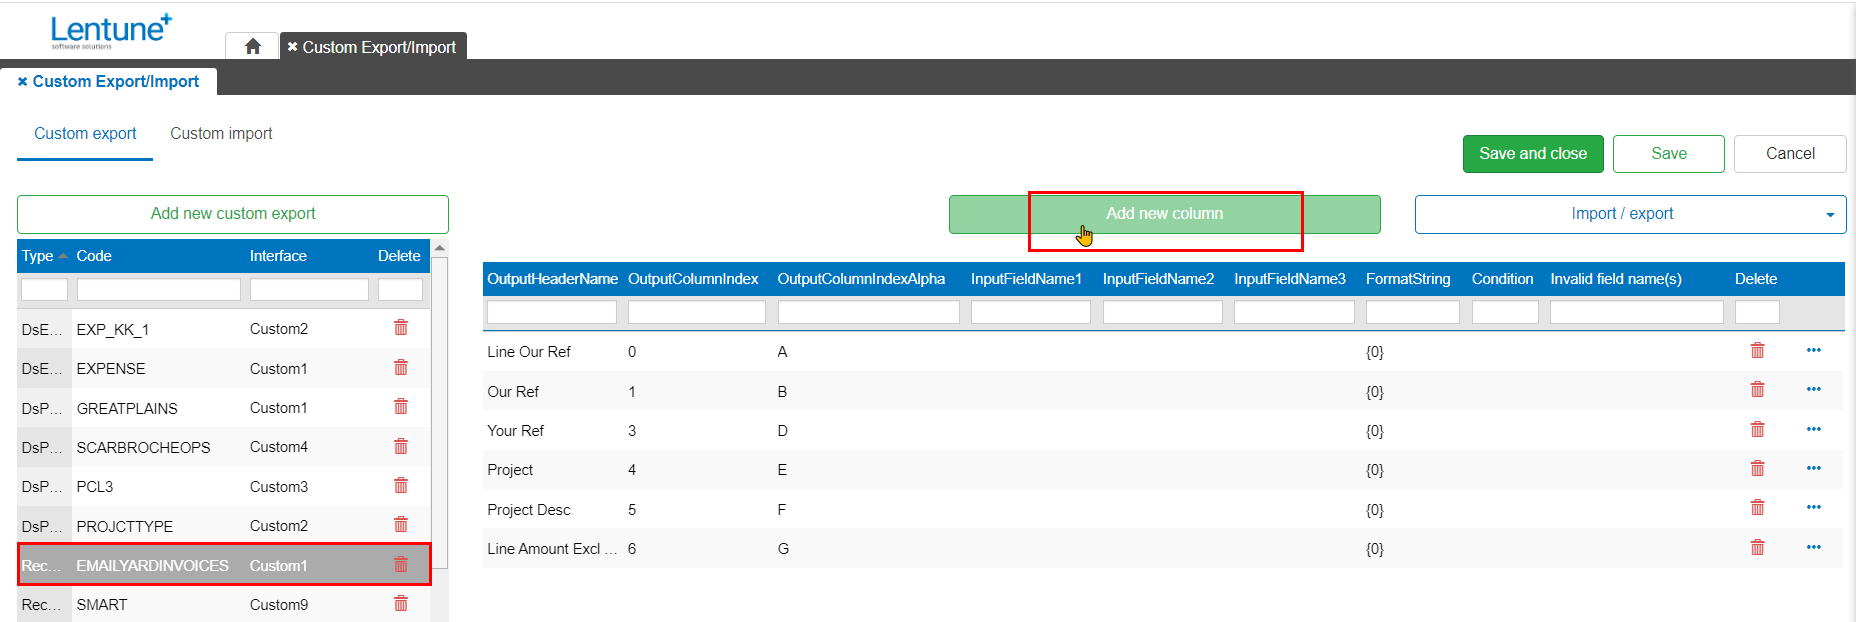
This takes you to the Create Custom Export Column screen where you can select the details to be included in your export.
-
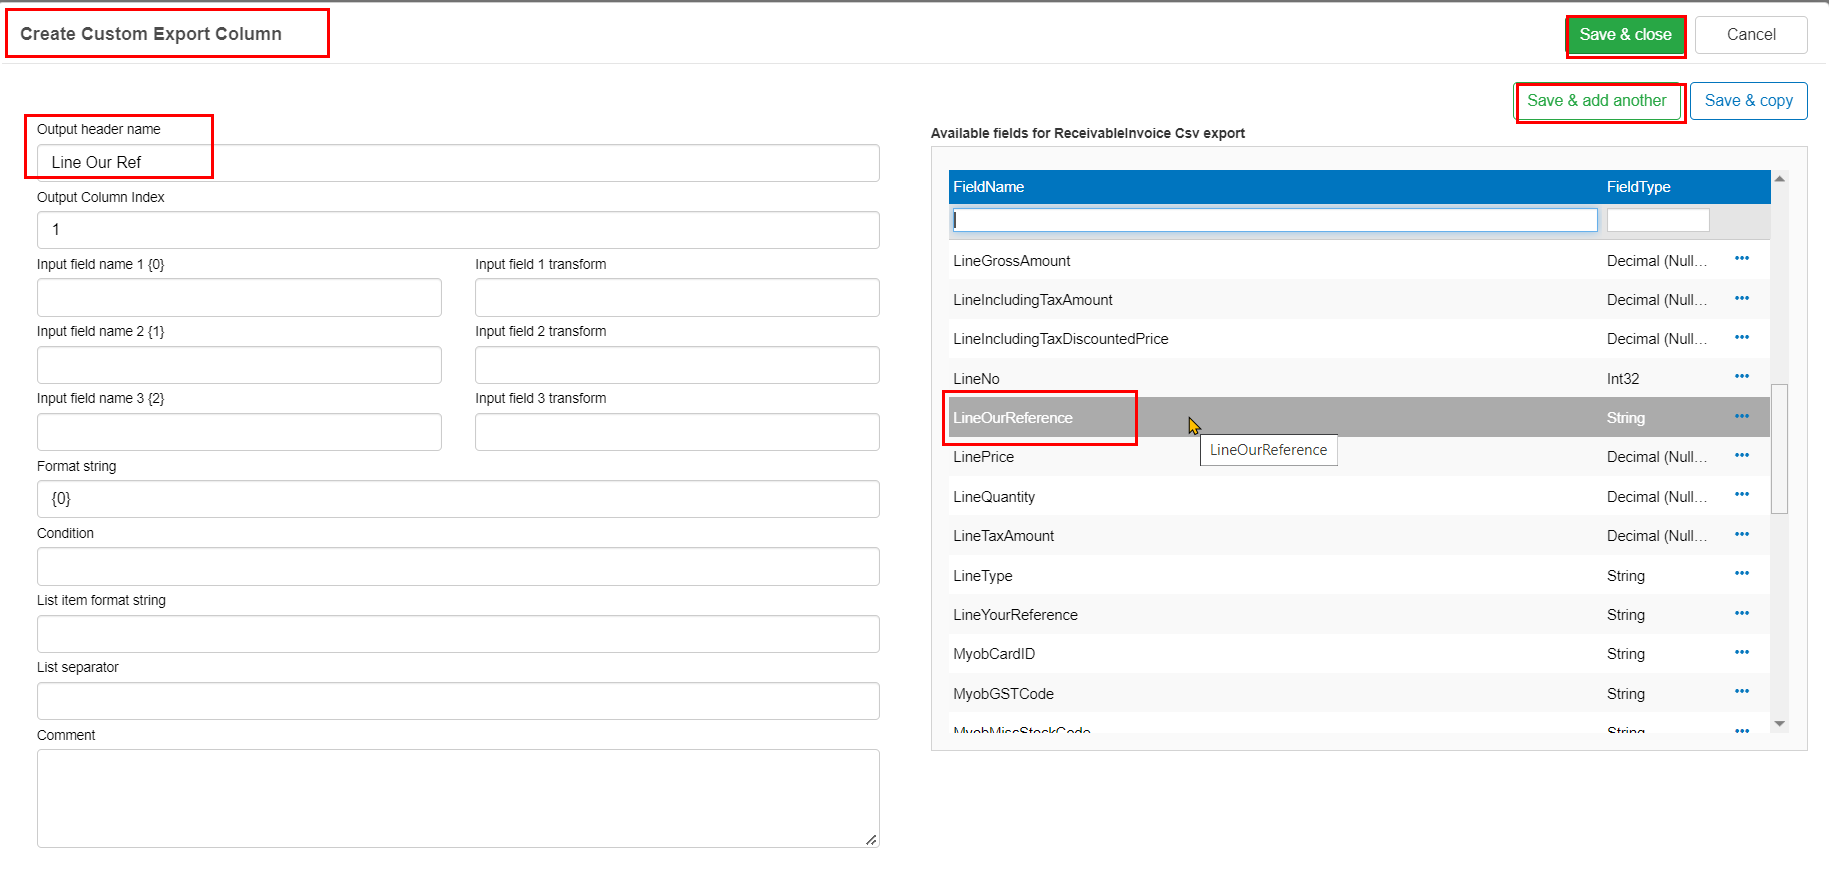
Output header name: Enter a name for this column; e.g. we want this column to be the LineOurReference, so we can call the column header name Line Our Ref.
On the right, from the Available fields for ReceivableInvoice Csv export section, scroll down to find the field name that you want. The fields you select will be relevant to the type of data that you want to export.
-
Select the column field you want. e.g. LineOurReference.
-
Click Save and add another.
-
Continue to add all fields that you want for your export.
The fields we have added for this example to export and email Yard Invoices are:
-
-
Line Our Reference.
-
Our Reference.
-
Your Reference.
-
Project Code.
-
Project Description.
-
Line Amount Excl Tax.
-
When you have added all the lines you require:
- Click Save & close.
You can see the lines that you have selected. You could remove a line by clicking the Bin icon beside the line, or re-order the lines by clicking the Ellipse icon (three dots)
  and move lines up or down.
- Click Save and close.
What's next?
Now you have created the custom export, and you can use it to email the Yard invoices to the Receivable Account.
To read about that, please read Export Invoices from Yard Bookings.
Need more help? We’re here! We hope our article was helpful! If you need more info or want to connect, drop us an email at support@lentune.com.
Thank you. We love to hear from you!
Last updated: 14 February 2023