Introduction
You can enter a Leave Request for yourself of for a crew Member. The Leave Requests are then submitted for approval.
Enter a Leave Request
To enter a Leave Request for yourself or a Crew Member:
- Go to Time Sheets > Leave Requests.
- Click New Leave request.
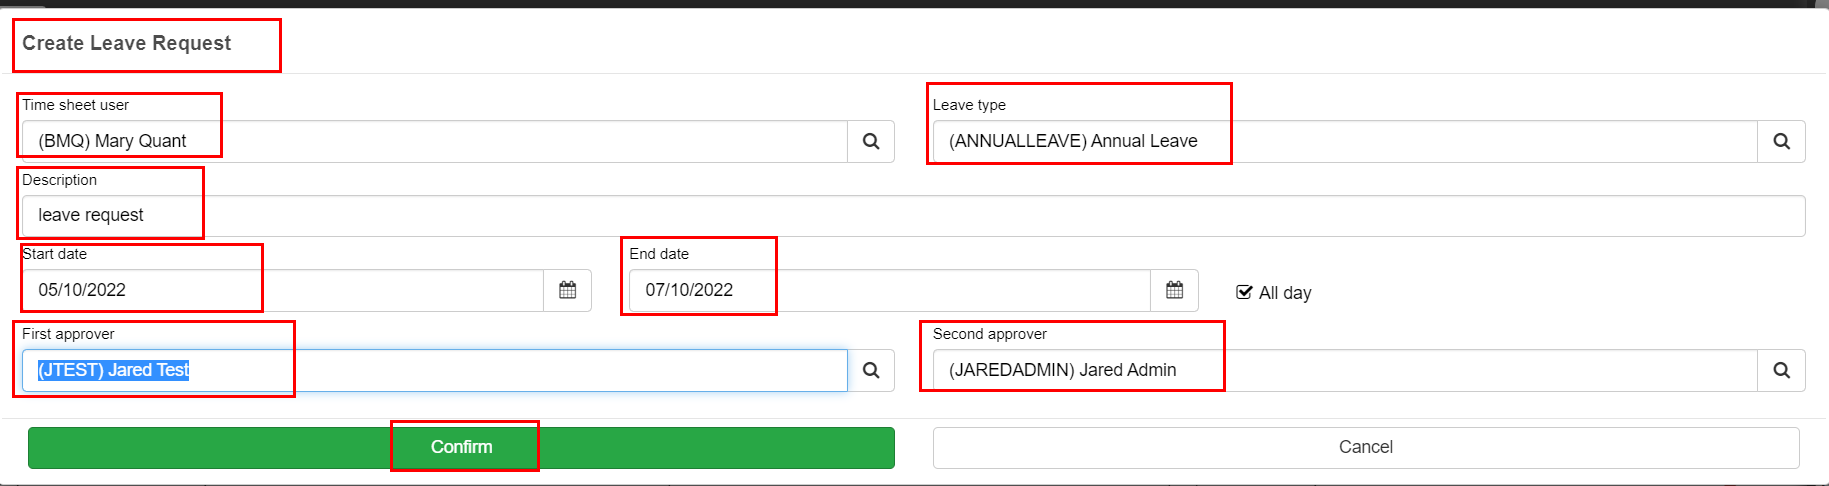
In the Create Leave Request screen:
- Time sheet user: This will default to your own User code. You can select another User from the dropdown list if you are entering a Leave Request for another User.
- Leave Type: Select the Leave Type from the dropdown list, e.g. Annual Leave.
- Description: Enter a Description if required.
- Start date: Select the start date for your leave request.
- End date: Select the end date for your leave request.
- All day: This flag is checked automatically. However you can uncheck it if you want to request a part day's leave. In that case, enter the Start time and End time for the Leave Request.
- First approver: Select the First Approver from the dropdown list. You must select the First Approver
- Second approver: Select the Second Approver from the dropdown list. You may leave this field blank if only one approver is necessary.
- Click Confirm.
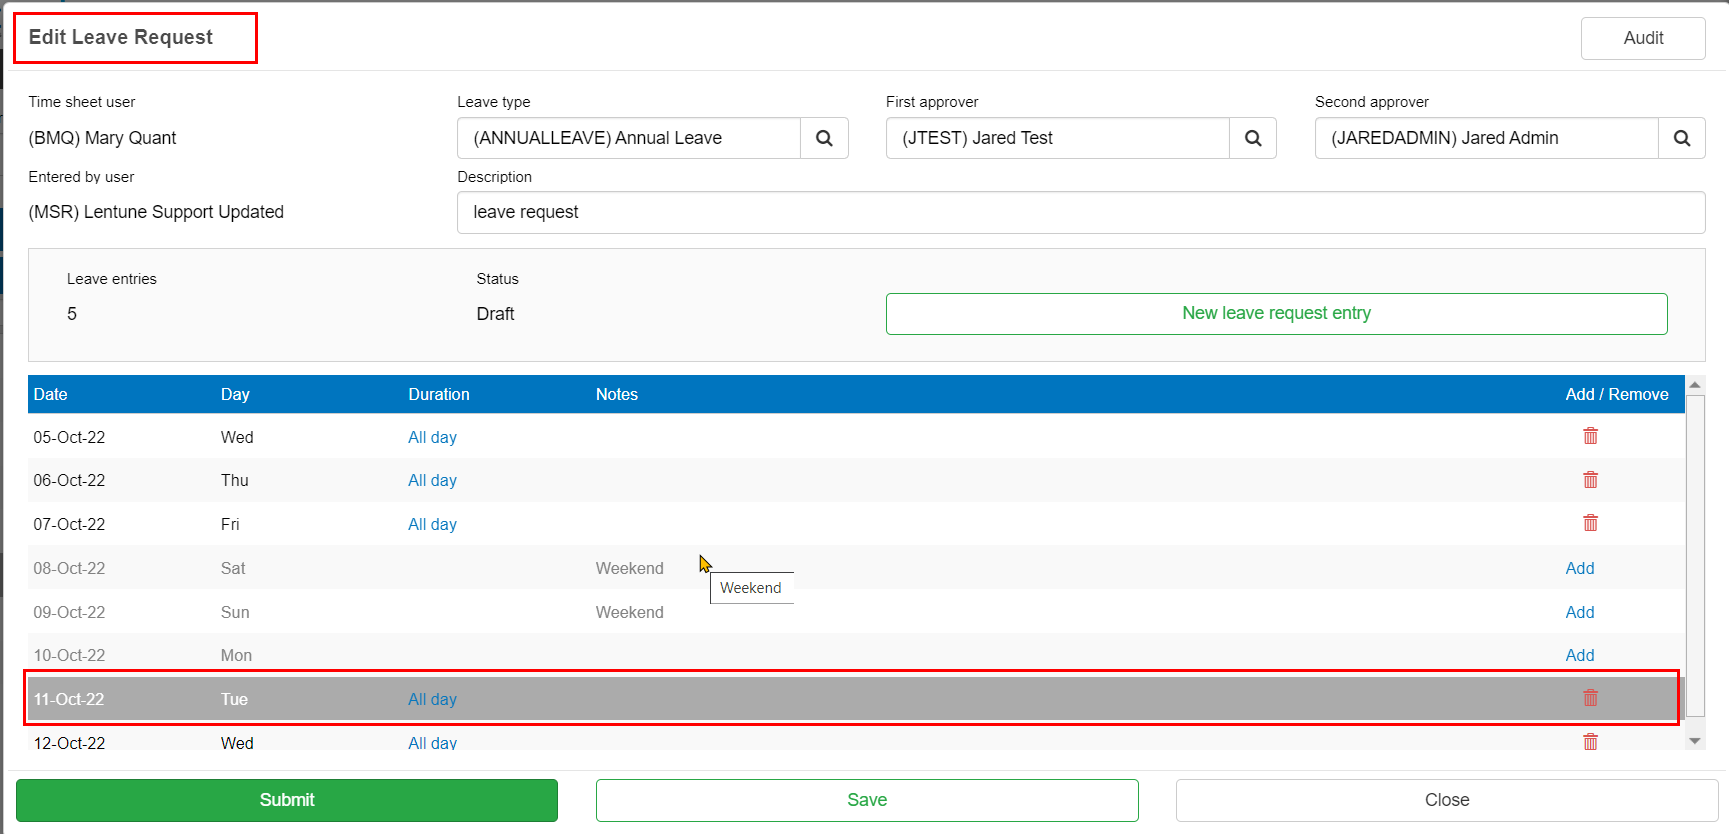
This takes you to the Edit Leave Request screen. You can see the Status for the entry is Draft.
Here you can edit any details, delete a line, and Save or Submit the request.
- Click Save to save the entry without submitting, or:
- Click Submit to submit this entry for approval.

Add another day's consecutive Leave Request
You also have an option to add another New Leave Request from this screen. This must be for the same person and the same Leave Type.
TIP: It is suggested that you add a New Leave request only where the next day/s you want to add are consecutive to the days already entered and are for the same Leave Type. Otherwise, Save / Submit this entry and enter a new Leave Request entry from the previous screen.
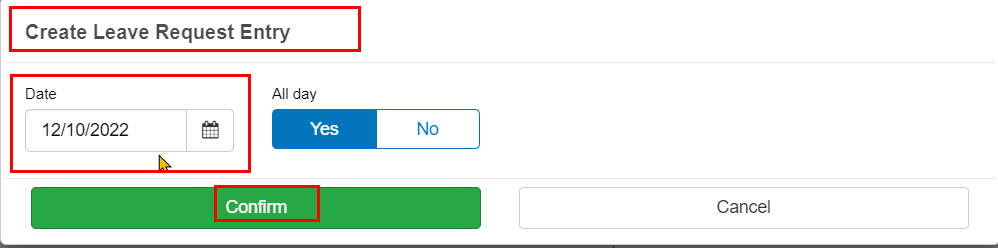
To add a new entry from the Edit Leave Request screen:
- Click New Leave Request entry.
In the Create Leave Request Entry screen:
- Date: Enter the end date for the additional days that you wish to request.
- Click Confirm.
This takes you back to the Edit Leave Request screen.
Now you can see that a new Leave Request line has been created for every day since the last day of your previous Leave Request and the new End Date you entered. The line for the End Date that you selected will have been created. However, there are also tentative lines that have been created for the other days that fall within the date range and these days may also include weekend or holiday days within these dates. These other days need to be confirmed as leave days if they are required. However, you wish to delete the tentative entries, you must Add and Confirm them to be able to delete them.
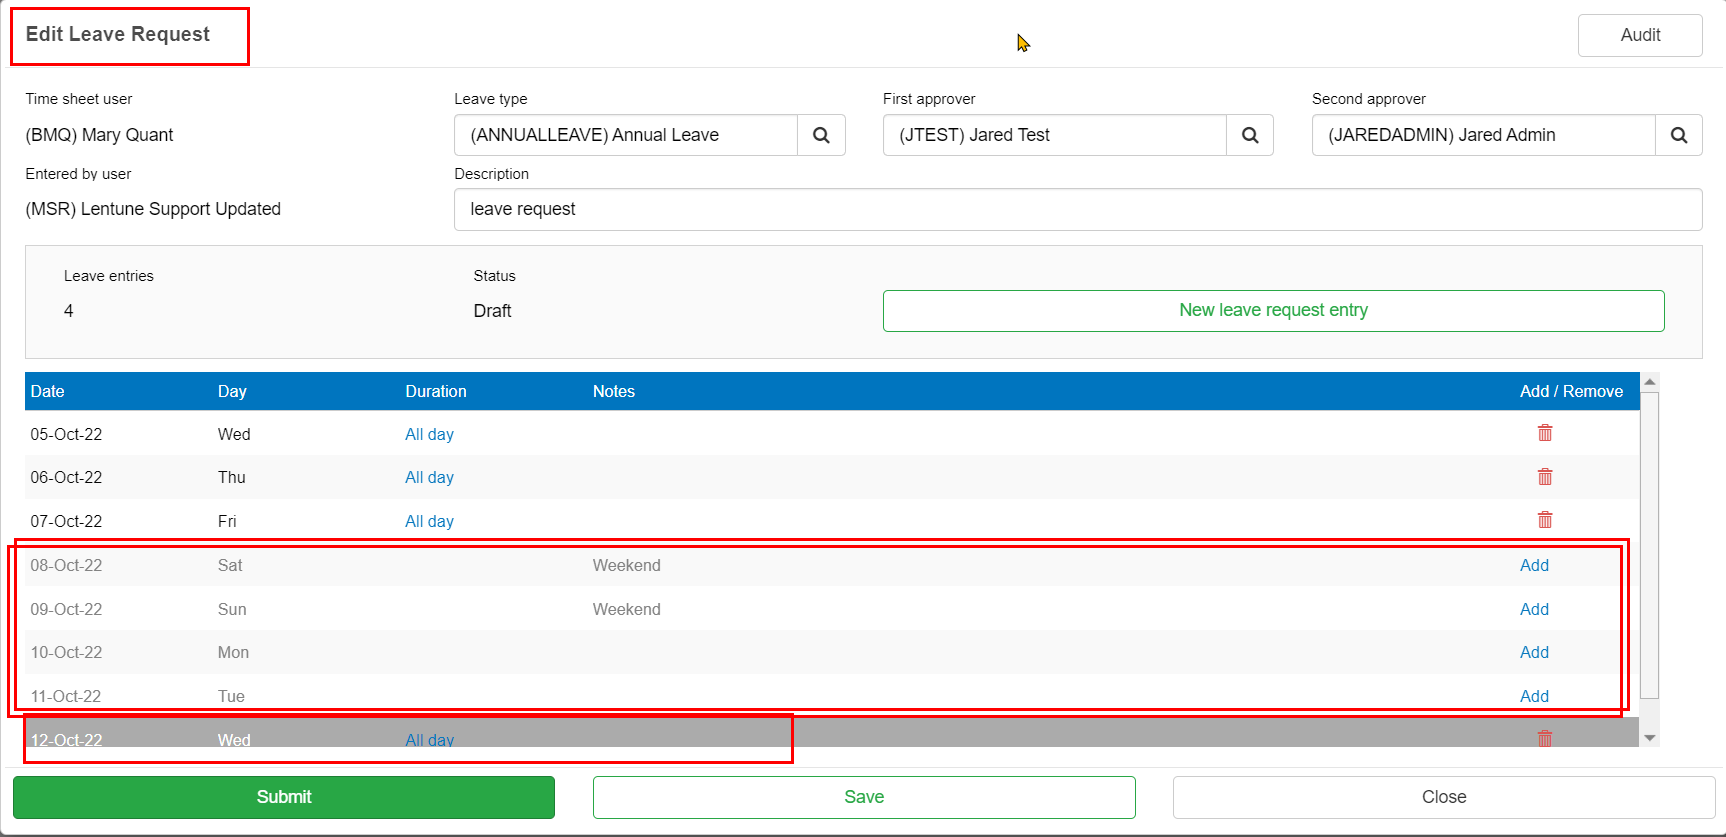
Now you must Add and Confirm each of the lines that you wish to add. To Add the entry for that day:
- Click Add.
- Click Confirm.
The confirmed day will then show with the Bin icon ![]() instead of Add.
instead of Add.
- Click Save to save these entries without submitting, or:
- Click Submit to submit these entries for approval.
Watch the Video 
Prefer to watch the video? Andrew takes you through the process:
Need more help? We’re here! We hope our article was helpful! If you need more info or want to connect, drop us an email at support@lentune.com.
Thank you. We love to hear from you!
Last updated: 17 July 2023