Introduction
You can export the Yard items to a spreadsheet file, which you can then add to and re-import.
If you don't yet have any Yard items in your system, the blank file will give you a template to use to add data and then import that data.
Images can also be imported in a separate import routine and attached to the Yard items. If you wish to import images, you will need to import those before you import the spreadsheet. During the import spreadsheet process, the images become attached to the Yard Item, as long as the image name, description and image name have been populated in the spreadsheet.
If you need to export a spreadsheet of Active / Inactive numbers of your Yard items, please refer to Export Yard Items with Active / Inactive Count.
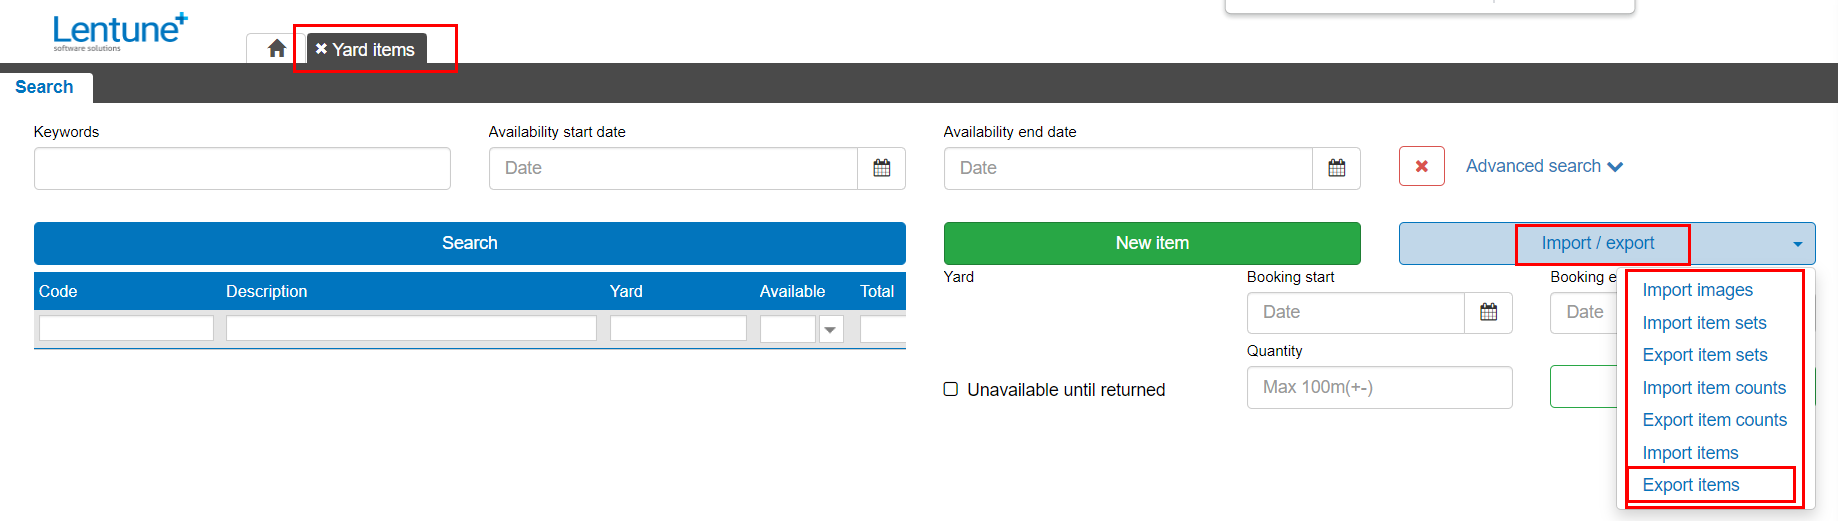
Export Yard Items
To export Yard items (or a blank spreadsheet if there are no items in your system):
- Go to Yard > Yard items.
- Click Import / Export.
- Click Export Items.
This will create and download an .xlxs file. The file contains columns for these fields:
- Code, Internal Notes, Active, Description, Daily Rate, Five Day Rate, Thirty Day Rate, Maximum Charge, RtItem GroupA, RtItem GroupB, RtItem GroupC, Next Service Date, Barcode, Additional Keywords, Fixed Asset, Item Count.
You can now edit or add to the file and re-import it.
Import Images for Yard Items
You may import images as individual files, or one .zip file containing all images that you wish to import.
NOTE: The image file name must be recorded in the spreadsheet you will import below.
- Go to Yard > Yard items.
- Click Import / Export.
- Click Import images.
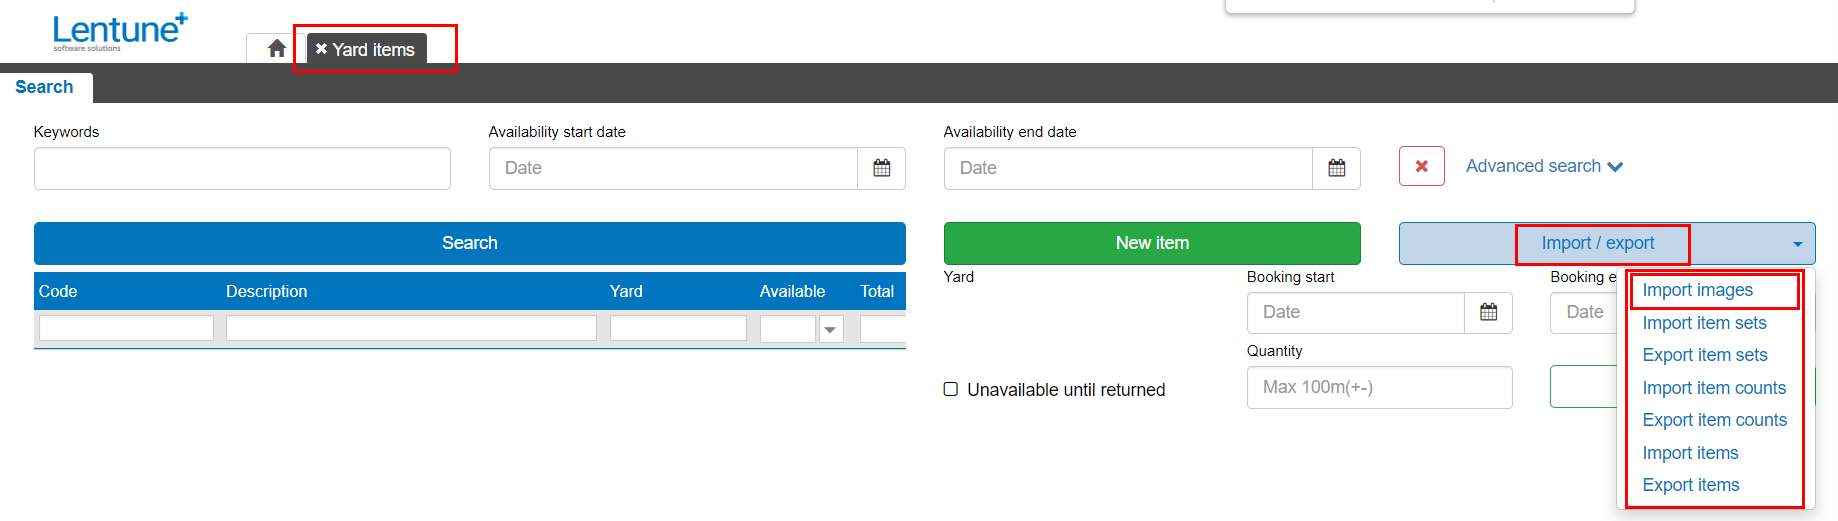
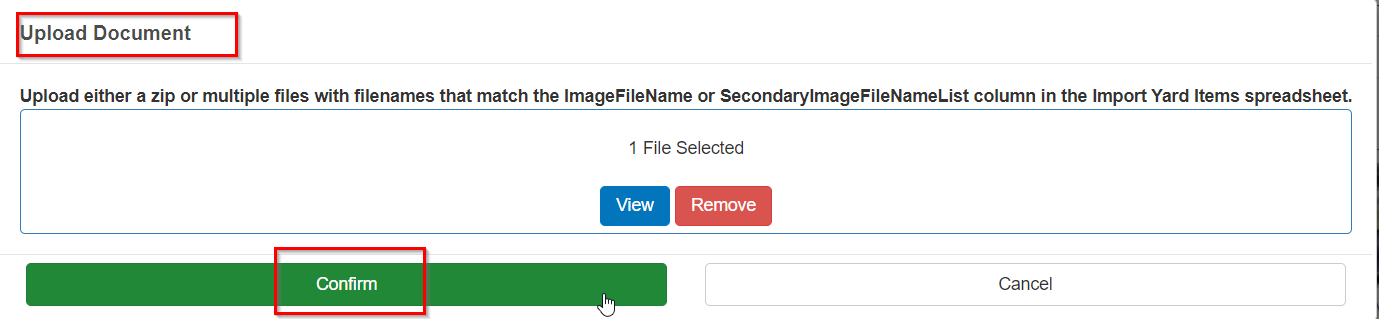
- Select your file/s to import.
- Click Confirm.
The images are now in the database awaiting the import of the spreadsheet.
Edit your Spreadsheet to add Image Names
Export and edit your spreadsheet to add image file names:
- Export a spreadsheet. (Refer above.)
- Edit the spreadsheet to add a column called ImageFileName.
- In any row that you are adding an image for, populate this column with the file name (including the extension) for the Yard item image, e.g. Digger.jpg, Excavator9.png, etc. This allows you to add the image file against the correct Code for each Yard item.
If you are adding new Yard Items to the spreadsheet to be imported, as well as images, you must ensure that the Item Code and Item Description fields are populated.
- Save your file.
Import Yard Items with Image Names
You can import Yard Items only, if you do not wish to import images at this stage;
OR:
You can import images and then import the new Yard Items on your spreadsheet. The images will then attach to the new Yard Items.
Tip: If you intend to import images and new Yard items, you will need to ensure the following steps have been completed first.
- Add the Yard Item Code to the Spreadsheet, if the Yard item does not already exist in the database.
- Add the Yard Item Description to the spreadsheet, if the Yard item does not already exists in the database.
- Add the image file names to the spreadsheet for each item that has a new image to be attached. Refer above for how to edit your spreadsheet to add image file names.
To import Yard items from your spreadsheet:
- Go to Yard > Yard items.
- Click Import / Export.
- Click Import Items.
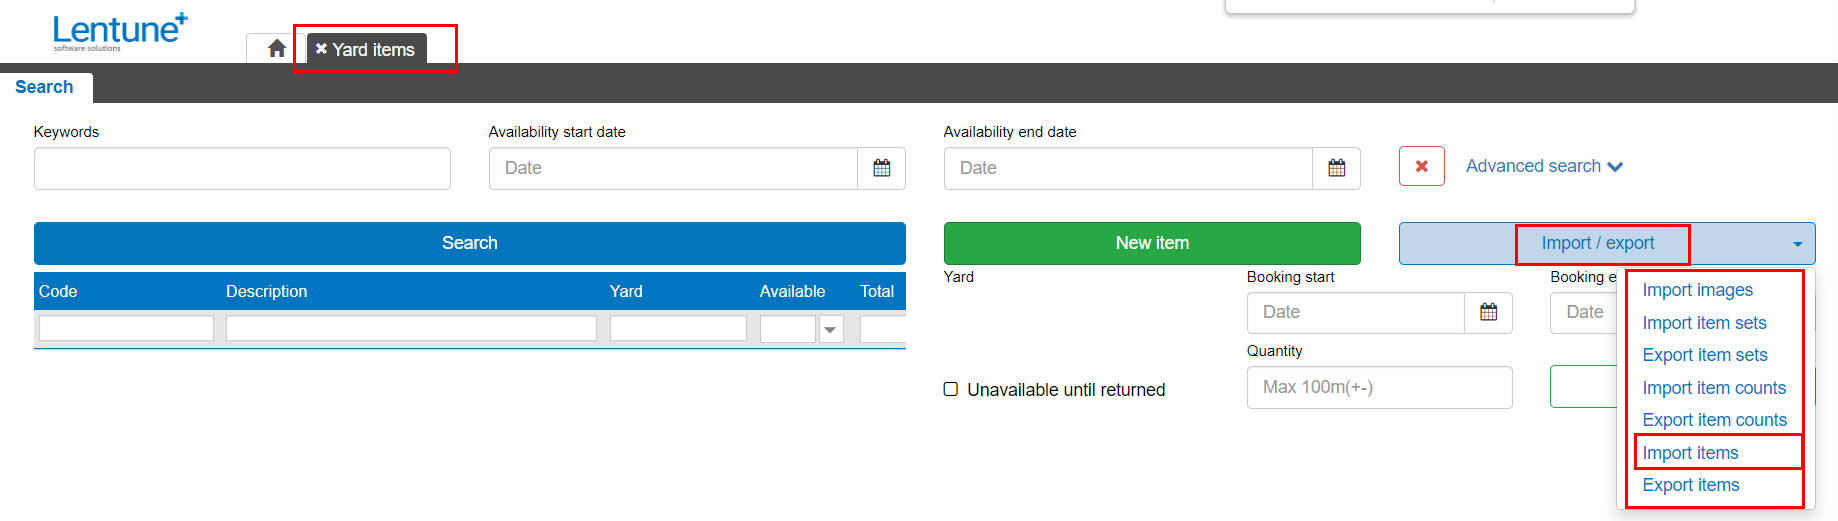
- Select your file or drag it to the selection dialog.
- Click Import.
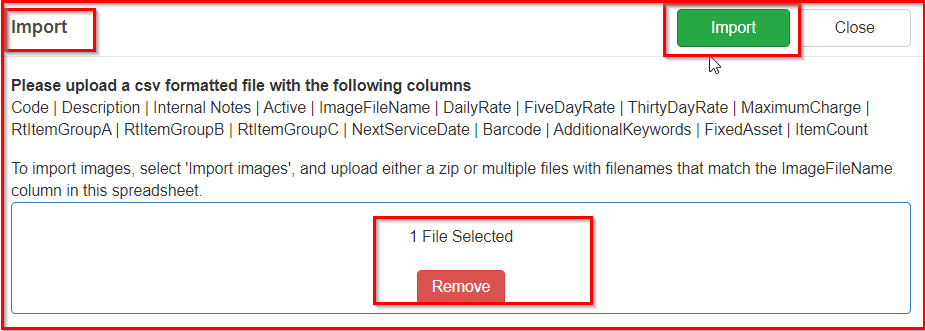
This will import your file and your new items will appear in the search screen, where you can edit and view them as usual.
If you have imported images, and the image names are included in the file, these images will now be attached the respective Yard Item.
Upload An Individual Image
You may also upload images individually by editing the Yard item, and from the Details or Images screen, browse to select your image file, or drag the image file to the dialog box and click Upload images.
You can add multiple images for a Yard item, by selecting or dragging another file to the Upload images screen. Then you can select which is the main image to display in the Item images screen.
To upload one image to a Yard Item:
- Go to Yard > Yard Items.
- Select the Yard Item you want.
In the Edit Item Set screen:
- Click the Images tab.
- Click Upload Image.

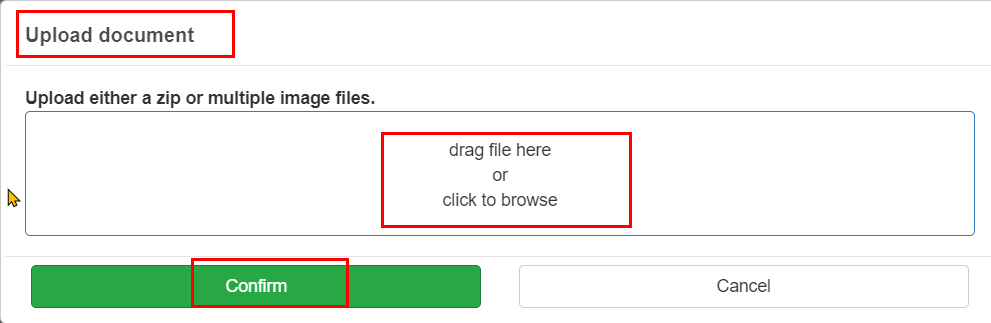
In the Upload document screen:
- Select your file by dragging it to the selection box or browsing.
- Click Confirm.
Delete Yard Item Image
If you need to delete an image:
- Go to Yard > Yard items.
- Select the Yard item.
- Go to the Images tab.
- Click the dustbin
 icon.
icon.
Need more help? We’re here! We hope our article was helpful! If you need more info or want to connect, drop us an email at support@lentune.com.
Thank you. We love to hear from you!
Last updated: 13 February 2023